Friday, 31 August 2012

Pulled Pork with Chipotle Coleslaw

 
After my adventures in harissa paste, which, I’ve discovered, goes brilliantly with lamb and I’ve also now started craving it with eggs, I decided to get to grips with the chipotle paste that Sainsbury’s sent me to try out, from their new Speciality Ingredients range.
 
 
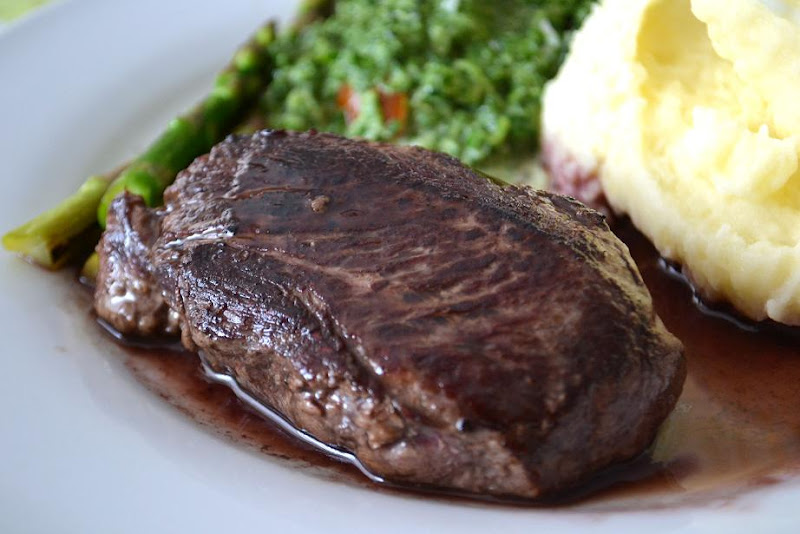
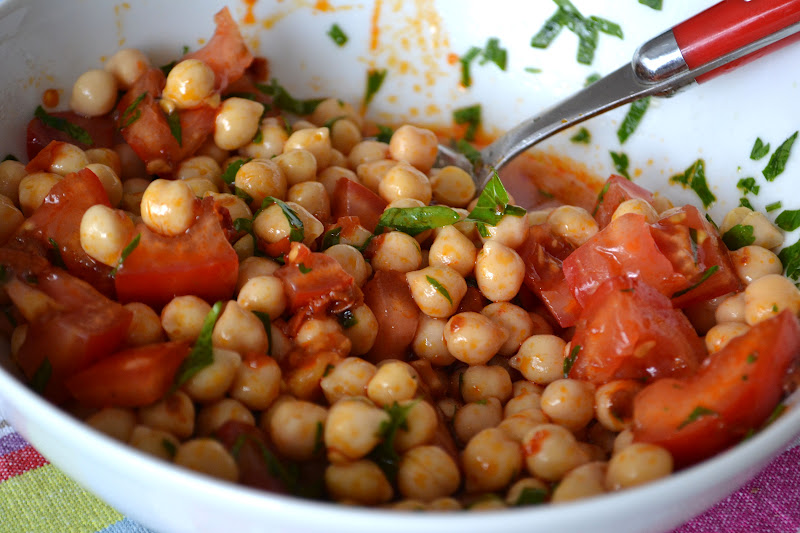
Now, I think of chipotle (pronounced ‘chi-poht-lay’, ladies and gents) and the first thing that comes to my mind is a burrito. Tender, slow-cooked pork meat, beans, rice, veggies, guacamole and salsa all stuffed inside a tortilla wrap. But at my local burrito place, if you don’t fancy a whole burrito you can get a salad plate – basically all the fillings on a plate instead. And so for a (slightly) lighter meal I made this for the family and also some chipotle coleslaw to go alongside.
 
 
The pork was cooked all day in beer and onions, with a bunch of thyme thrown in for flavour, which meant all I had to do at dinner time was cook some basmati rice, heat some tinned beans with sliced garlic and knock up a quick salad and guacamole. All I did to add that smoky, spicy hum to the coleslaw was to stir in half a teaspoon of the chipotle paste into 2 dessertspoons of mayonnaise before stirring it through the grated and chopped coleslaw veggies. It’s important to do it this way round rather than try to add the chipotle paste in at the end otherwise you’ll get extra spicy bits that don’t blend into the mayonnaise as well. Also, let your spice tolerance guide you on this – use less or more paste depending on how spicy you like your food.
 
I can’t tell you how good the pork leftovers were in a bread roll with some of this coleslaw. I don’t see why you couldn’t make your own chipotle salsa from the paste, either, to go with a burrito or add some into the pork before slow-cooking. Now I think about it, there are loads of ways you could use chipotle chilli paste. And I thought I was getting addicted to harissa.  
 
Smoky Chipotle Coleslaw
Serves 2-3
Ingredients:
  • 1 large carrot, grated
  • 3-4 leaves from a savoy cabbage (I choose savoy because I like the colour and the fact that it frills a bit, giving texture, but choose any cabbage you like), washed and sliced thinly
  • 2 spring onions, washed, trimmed and sliced into thin rounds
  • 2 heaped dessertspoons of good mayonnaise
  • half a teaspoon chipotle chilli paste
Method
  1. Mix together the mayonnaise and chipotle chilli paste until blended.
  2. Toss the grated carrot, sliced cabbage and sliced spring onions together and spoon in the chipotle mayonnaise. Stir well until combined.


Other ideas for chipotle chilli paste
  • In Giraffe, they serve a chipotle mayonnaise with their chips – just stir the paste into a serving of mayo and dunk your chips in.
  • You can also use the paste to make a good chilli con carne – add some to some minced (or diced) beef along with kidney beans and peppers for a deep, rich-flavoured chilli dish. It’s way past my bedtime as I write this, but I’m craving a bowl of this right now. (Thanks to @jmdale for the recommendation).
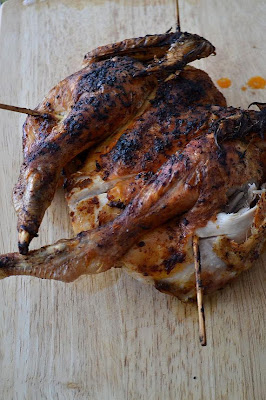
  • Use some paste to make a rub to season meats before roasting.
  • I reckon this wouldn’t be bad with eggs, either.
  •  


Do you cook with chipotle paste? What are your favourite recipes for using it?


Thursday, 30 August 2012

Mini Harissa Lamb Burgers and a Chickpea, Tomato and Harissa Salad

If you find it difficult to get hold of harissa paste, umami paste or galangal in your local supermarket, here’s some good news. Sainsbury’s have just launched their Speciality Ingredients range – over 30 products from all over the world (including Japan, the Middle East and the Mediterranean) to help you cook up your favourite dishes.
 
 
They sent me a small sample from their range to try out: harissa paste, mirin, chipotle paste, porcini mushroom paste and tom yum paste. The first one I decided to tackle was the harissa.
 
Harissa is a deep red-coloured paste made from red peppers, chillies, garlic and spices including smoked paprika. It’s great for adding a spicy, smoky flavour to almost anything, although it works especially well with lamb, chicken or fish. It has a flavour a bit like chorizo, only spicier.
 
I decided to add a spoonful to some lamb mince and make some little mini burgers for the kids. They loved it – I was cautious with the harissa, but if you want to add more just go ahead and be guided by your own spice tolerance.


I also decided to pep up a salad made with chickpeas, tomatoes, lemon juice and parsley by stirring through some harissa paste. The smokiness of the harissa worked brilliantly with the soft nutty chickpeas and then the sweet, ripe tomato. You can’t waste the juices either – mop them up with some crusty bread. I reckon this would be a great salad to try with roast chicken, too.


Mini Harissa Lamb Burgers
Makes 8
Ingredients
  • 400g lamb mince
  • 1 heaped tablespoon harissa paste
  • salt and pepper
  • olive oil, for frying
  • rocket leaves
  • 1 large tomato, sliced
  • 8 mini bread rolls
  • mayonnaise
Method
  1. In a bowl, mix together the lamb mince and the harissa paste with your hands, ensuring it is evenly covered. Don’t mix too much, just until it’s combined. Season with a little salt and pepper.
  2. Heat a drizzle of olive oil in a large, shallow frying pan. Form the lamb mixture into 8 small patties and fry for about 4 minutes on each side, or until done.
  3. In the meantime, split the rolls and spread a little mayonnaise on the bottom half. Place a tangle of rocket on top and then a slice of tomato. Carefully balance the cooked lamb burger on top, replace the top half of the bun and then secure it with a wooden skewer. Eat straight away.

Harissa Chickpea and Tomato Salad
Serves 4-6
Ingredients
  • 1 x 400g can chickpeas
  • 1 tomato
  • small handful fresh parsley
  • juice of half a lemon
  • salt
  • extra virgin olive oil
  • 1 heaped teaspoon harissa paste
Method:
  1. Drain the chickpeas and tip them into a serving bowl. Chop the tomato and parsley and add to the bowl. Mix well to combine.
  2. Squeeze over the lemon juice, a drizzle of extra virgin olive oil and season with a good pinch of salt. Spoon in the harissa paste and toss everything well to mix. Check for seasoning and then take to the table.

How do you use harissa? Do you have any interesting recipe ideas for it?


Tuesday, 28 August 2012

Raspberry and Amaretto Chocolate Brownies

Ever since I ate the Raspberry and Amaretto chocolate brownie from the Jamie’s Italian stall at Eat Reading Live, I couldn’t get it out of my mind. Intensely dark chocolate, sweet raspberries and the almond kick of Amaretto all dusted thickly with icing sugar. I knew I wanted to make a version at home, but make it healthier – lower in saturated fat, but with all the flavour of the original.
  
So here’s my version: the brownies are made with mayonnaise, which is used instead of butter so although it does sound weird, you get a full-flavoured but lighter brownie. The recipe is adapted from one by Hellmann’s but I tweaked the sugar, cocoa and chocolate quantities so the brownies didn’t come out too sweet with all that liqueur and fruit in there.
  
I used frozen raspberries, because I always have some handy in the freezer, but use fresh if you have them. And if you don’t have any Amaretto handy, either use a teaspoon of almond extract or just leave the liqueur out. These disappeared too quickly, but I did have in mind for them a fancy affogato-type dessert with a slab of the brownie, a scoop of vanilla or chocolate ice cream and then a drizzle of Amaretto poured over the top. But never mind. I’ll just have to make them again, won’t I?


Lower-Fat Raspberry and Amaretto Chocolate Brownies
Cuts into about 30-36 squares (depending on how chunky you cut them)
Ingredients:
  • 40g plain flour
  • 1 tsp baking powder
  • 35g cocoa powder
  • 80g dark chocolate (I used Green and Black’s)
  • 3 eggs
  • 170g caster sugar
  • 1 tsp vanilla extract
  • 110g Hellmann’s mayonnaise
  • 30ml Amaretto
  • 150g frozen raspberries
 
Method:
  1. Line a 25cm square baking tin with greaseproof paper. In a bowl, mix together the flour, the baking powder and the cocoa. Make sure there aren’t any lumps.
  2. Melt the chocolate – either gently, in the microwave, or in a bowl over a pan of simmering water.
  3. Whisk the eggs with the sugar, Amaretto and vanilla until it starts to thicken – now stir in the melted chocolate.
  4. Fold the flour mixture into the egg mixture. Tip in the raspberries and fold in the mayonnaise until it’s all combined and silky.
  5. Scrape into the baking tin and bake at 160°C for about 35 minutes until the brownies are fudgy but cooked through, with that crisp topping.
  6. Cool, cut into squares and dust liberally with icing sugar.
What do you think of these?  What are your favourite brownie recipes?

Monday, 27 August 2012

Argentinian Milanesas a Caballo (Beef Milanesas with a Fried Egg)

Milanesas are one of the comfort foods of my husband’s childhood. It seems that as he was growing up in Argentina, at every family gathering there would be a pile of hot, crisp milanesas to tuck into with salad and chips. I’ve made them a few times now, the way that my mother in law taught me and they are really good. We like them with home-made oven chips and a tangy side salad, but you could have them with mashed potato or on their own. Any leftovers are brilliant put to use in a sandwich with a little salad and mayonnaise – you also get that double carb burst of the crisp breadcrumbs and the soft bread.
 
I’m not sure where the a caballo part comes from with this dish, as a caballo translates as ‘on horseback’ – but just means that the milanesa is topped with a fried egg. But don’t be compelled to add the egg if you don’t fancy it – just eat the milanesas as they are, as I often do. Oh and as much as I diligently stir together a quick chimichurri salsa whenever beef is mentioned, you don’t need it here. You’ll just get soggy breadcrumbs.


The recipe is below, but do take these points into account when making the best milanesas:
  • Use dried, ready-made breadcrumbs: you’ll see I’ve used home-blitzed breadcrumbs in the photos here, but for the best, crunchiest milanesas you need to use that powdery, ready-made stuff in tubs and packets. My mother in law uses this, and when I went all cheffy and tried to use my own, it just didn’t have the same crunch, the breadcrumb was too thick and it just wasn’t right.
  • Get your steaks nice and thin: If you’re not using frying steaks, which are already thinly cut, get yourself a couple of big rib eye or sirloin steaks, lay a piece of cling film over the top and bash them until they’re really thin. Your milanesas will cook really quick (just a few minutes on each side).
  • Get the best steaks you can afford: avoid at all costs frying steaks (or other steaks) with thick lines of gristle or fat running through them. As they’re breadcrumbed, you can’t see what you’re eating and end up chewing on a big vein of gristle. Not nice. Go for tender, matured, thin steaks that will cut easily and cook quickly.
 
 
Milanesas a Caballo (Breadcrumbed Beef Topped with a Fried Egg).
Serves 4
 
Ingredients
  • 4 frying steaks (or larger steaks, bashed with a rolling pin – see above)
  • 200g breadcrumbs (preferably ready-made bought ones)
  • 1 fat clove garlic, chopped
  • Pinch of salt
  • Oil for frying
  • 4 eggs
 
Method
  1. Crack the egg in a bowl and beat well. Add a pinch of salt and the chopped garlic clove and tip the breadcrumbs into a shallow dish.
  2. Heat about 3-4 tablespoons of oil in a large shallow frying pan. Take your thin steaks and dip them once in the egg mixture and then into the breadcrumbs, pressing them down so they stick to the meat. Carefully lower it into the hot pan and let it sizzle. Reduce the heat and cook for about 4 minutes on each side. Do the same for all the steaks.
  3. When the steaks are just cooked, crack 4 eggs into a frying pan with a drizzle of oil. Fry them until just cooked (the yolk should still be runny) and then serve the milanesas with the fried egg on top: a caballo.

  Milanesa

Friday, 24 August 2012

African Volcano Peri Peri Spatchcocked Chicken and Stuffed Peppers

I’ll be honest. Up until now I never much liked Peri Peri chicken. It all just seemed about heat and not much else, which took away the flavour of the chicken and gave you a mouthful of nothing but fire.
 
But this week I got to try African Volcano Peri Peri marinade and it was different to everything else I’d tried before. It’s been developed by Master Chef Grant Hawthorne who has been tweaking the recipe since the 1990s. His marinade, although it packs a punch, has a fragrance and a flavour that made me realise what I’d been missing.
 
I decided to spatchcock a whole chicken, rub in the marinade and roast it. As soon as it hit the heat of the oven the kitchen was filled with aromas of chilli, herbs and spices, and of course the chicken, roasting away and turning crisp.
 
I also made a spicy side dish of whole peppers, stuffed with Peri Peri flavoured rice. Here’s how I made both:


Peri Peri Roasted Spatchcock Chicken
  
Serves 4
Ingredients 
 
 
1 x 1.2kg whole chicken, spatchcocked
half a bottle African Volcano Peri Peri marinade


Method 
 
Lay the spatchcocked chicken, breast side up, into a foil-lined roasting tray. Massage the Peri Peri marinade all over the chicken, making sure you get it in all the creases and on the meat underneath.
 
Preheat your oven to 200C and slide in the roasting tray. Roast for one hour and leave to rest for 15-20 minutes before carving and serve with crisp, hot potato wedges and a green side salad.
 
*Grant Hawthorne recommends that to get the full flavour of the Peri Peri marinade, squeeze over a little lemon juice after cooking or use some freshly made lemon butter*


Peri Peri Rice Stuffed Peppers
 
Serves 3-4
 
Ingredients
  •   3 whole peppers
  • 170g uncooked long grain rice
  • 2 tbsp African Volcano Peri Peri sauce
Method
 
 
  1. Preheat your oven to 200C. Wash the peppers, slice off the tops and scoop out the seeds and membrane from inside.
  2. Boil the rice until just tender. Rinse under cold running water and drain well. Stir the sauce into the rice and spoon into the empty peppers. Replace the tops.
  3. Drizzle with a little olive oil and wrap loosely in foil. Roast for 20-30 minutes.
  4. This is just the basic recipe for the peppers, play around with any other chopped veg, herbs, or try using couscous instead of rice. I topped my peppers with a slice of goat’s cheese, which seemed natural to balance all that heat, but I’m not convinced that it entirely worked. Have a play around with the flavours yourself and let me know how you get on.

 
For more information, visit the African Volcano website or try it for yourself at Grant Hawthorne’s stall at the Maltby Street food market in Bermondsey, London, every Saturday.

Thursday, 23 August 2012

Argentinian Tomato Salad or Ensalada de Tomates y Cebollas

When my mother in law came to stay a few years ago, she taught me how to cook some Argentinian dishes. She made us guiso de lentejas, a bubbling stew made with minced beef, lentils and cabbage; milanesas, thin beef steaks covered in breadcrumbs and fried; and tortilla, a fat egg omelette with onions and chorizo. Lots of meat. And apart from the cabbage in the dish I mentioned, I don’t remember her eating many vegetables. 
 
In Argentina, they don’t tend to serve up great piles of steaming vegetables but choose to wash all that meat down with a huge range of salads. There’s ensalada mixta, handfuls of lettuce, onion and tomato all tossed together, and ensalada rusa, a mixture of boiled potatoes, carrots and peas bound together with a dollop or two of mayonnaise.
 
But one of my favourites is ensalada de tomates y cebollas – sliced tomatoes, raw onions, oil, vinegar and a pinch of salt.
 
It’s refreshing, juicy and the perfect counterpart for grilled or barbecued meats. And soon after it’s made, the tomato juices leak out and mingle with the vinegar and oil. Don’t waste it. Dip fresh, crusty bread into it once you’ve polished off the salad. Here’s how you make it.
 
Ensalada de Tomates y Cebollas…. a whole heap of tomatoes and raw onion


Argentinian Tomato and Onion Salad (Ensalada de Tomates y Cebollas)


Serves 2
Ingredients
  • 1 medium sized white onion
  • 2 large tomatoes
  • 2 tbsp extra virgin olive oil
  • 2 tbsp white wine vinegar
  • pinch of sea salt
Method
 
  1. Boil the kettle. Peel and slice the onion into thin rounds and transfer to a bowl. Pour boiling water over the onion slices just to cover and leave for about 2 minutes. Drain well. This removes most of the acidic raw flavour of the onion, making it easier to eat.
  2. Slice the tomato into thin rounds and toss with the onion. Drizzle in the olive oil, vinegar and add the salt and mix well, adding more vinegar, oil or salt to taste.

 
What are your favourite salads?

Wednesday, 22 August 2012

Could Our Morning Cup of Coffee Soon Be At Risk?

You get up, plod over to the kitchen and flick the kettle on. Or rev up the coffee machine. It’s the way many of us start every day, but according to the people at Cafédirect, coffee could soon be seen as an expensive luxury rather than an everyday pick me up.

They published a report this week, called Coffee Climate Crisis, which highlights the environmental problems that many coffee growers are facing around the world. They say that three quarters of the coffee produced around the world is grown by smallholders, who are already facing some of the effects of climate change, including flooding, pests, drought and crop disease. The answer, they say, is to buy our coffee from responsible sources and organisations that are committed to supporting growers and helping them to adapt to these issues.

Your morning cup of coffee…. but could its days be numbered?

The report gives the case of a project called Reforestation Sierra Piura which Cafédirect carried out alongside the CEPICAFE co-operative in Northern Peru. Responding to these environmental changes, they helped fund a reforestation programme higher up in the Andes. This has helped to stop landslides and flooding having such a devastating impact on plantations further down the mountains.

Speaking about the report, Nicola Pearson, Commercial Director at Cafédirect said: “Climate change is now the biggest challenge that smallholder farmers are facing today. The story in the report is just one case study of the severe and devastating impact that it is having on smallholder farmers and their crops.” She added that although the co-operative in the report, (6,600 Peruvian farmers) are adapting to the problems faced by climate change, more needs to be done, as this is just a tiny portion of farmers. She says there are around 25 million coffee farming families in 60 countries around the world.

By investing in and supporting these farmers, we might be able to save our morning cup of coffee. But what can we do? The answer is simple. Buy from responsible organisations that invest in projects such as this one in Peru, and help farmers keep their livelihoods and give them the tools to continue producing great coffee. If we don’t, they say that coffee is going to get a whole lot less affordable and could disappear as a crop altogether.

I’ll give Nicola the last word here: “If we don’t act now,” she said, “we will all be left counting the cost. Coffee will become more expensive, its quality will decline, and it may even become harder to get hold of. It doesn’t bear thinking about. We don’t want to have to imagine a world without coffee.”
 
Could you imagine a world without coffee? Were you aware of the environmental problems faced by coffee growers around the world? Does this worry you? Or do you think it’s not that big a problem? Let me know in the comments below…

Tuesday, 21 August 2012

Review: Cocoa Boutique Chocolate Tasting Box


Sometimes, your average bar of chocolate from the corner shop just doesn’t do the trick. Sometimes you want a bit of something more unusual and want to treat yourself with some hand-made, expertly produced chocolates with lots of different flavour combinations. Which is where chocolate tasting boxes come in.

I was asked recently to try out a tasting box from Cocoa Boutique, made up of hand-made chocolates created by leading chocolatiers. They describe themselves as a Luxury Artisan Chocolate Club and everything from the packaging to the actual chocolates really does feel special.

Chocolates from Cocoa Boutique, showing the Rum Café Cream, Pamela, Pink Champagne Truffle, Salted Dark Chocolate Caramel and the Milk Chocolate Almond Praline chocolates

The chocolates come in a handy-sized box that fits through your letterbox making delivery very easy and hassle-free if you’re out. You open the box, peel away the sticker keeping everything together and underneath there are so many different chocolates to taste, some with very unusual flavours. You also get a tasting guide, identifying the different chocolates with a scoring card that you can send back to Cocoa Boutique, to let them know which ones you liked best. You can also fill this in easily online which takes just a couple of minutes.


My chocolate tasting box contained chocolates created by chocolatiers Barry Colenso, former Chef Patissier at the Savoy and one of the chefs who made the McVities Chocolate ‘groom’ cake for the wedding of the Duke and Duchess of Cambridge; award-winning Master Chocolatier Pierre Ledent; and artisan Chocolatier Claire Hicklin.

As for the individual chocolates, here’s a run-down of what I thought of them:

Pink Champagne Truffle
A white chocolate truffle studded with dried raspberry pieces, and a creamy centre. As the white chocolate breaks, you get the sweet creaminess combined with a warm burst from the champagne. One of my favourite chocolates in the box.

The Pink Champagne Truffle from Cocoa Boutique
Rum Café Cream
Another of my favourite chocolates, this one is all about textures as well as flavour. It has a fluffy, whipped chocolate topping and a harder, melted chocolate base which makes this chocolate really silky and luxurious to eat. For me, it tasted of coffee but I couldn’t detect much of the rum – I expected it to taste more alcoholic but absolutely loved it all the same.

Dark Chocolate Brandy Truffle
Firm but soft on the inside and dusted with cocoa on the outside, this tasted firstly of chocolate, but then you get that warm, cosy brandy flavour that comes through.

Cocoa Dusted Dark Chocolate Salted Caramels
Oh my word. I’ve had salted caramels before that weren’t particularly salty, and some that were so salty it took the flavour of the caramel away but these were absolutely spot on. As they crack in your mouth, you get this ooze of the salted caramel inside. My absolute favourite chocolate, which I wasn’t sharing with anyone.

Cocoa Dusted Dark Chocolate Salted Caramel broken (OK, bitten) in half

Milk Chocolate Almond Praline
Inside this chocolate is an oven-roasted almond along with a smooth praline inside. Sweet, nutty and a little burst of saltiness.

White Strawberry Cream
This chocolate is really pretty. It’s a crisp white chocolate, dusted with a pink, shimmering topping with a creamy strawberry filling. Not overly alcoholic, it’s the textures and the fruitiness that I loved with this one.

Pamela
Another very pretty chocolate, this is a dark chocolate casing with cassis-pear ganache. It has a flowery-looking colourful topping.

Milk, White and 70% Ecuador Dark Chocolate Buttons
In the tasting box, I got a range of chocolate buttons. The milk chocolate buttons were creamy and had a sweetness to them unlike regular milk chocolate. The 70% Ecuador dark chocolate buttons were creamy and silky and slightly bitter – they were smaller than the others. The white chocolate buttons the children claimed their own, but I managed to pinch one – sweet, vanilla-like white chocolate.

The chocolates, as they come in the box

Raspberry with a Hint of Orange
A milk chocolate casing with a creamy filling of raspberry and orange – very fruity.

Milk Chocolate Truffle
It’s all about the milk chocolate: a crisp, milk chocolate coating with soft milk chocolate truffle underneath. I loved this one.

Vanilla Irish Cream
A half-sphere of chocolate with a creamy Irish whiskey flavour filling. Quite a strong alcohol kick in this one, but the vanilla brings that back a little, adding sweetness to the whole chocolate.

 
A selection of some of the chocolates, with the Dark Chocolate Coffee Bean cut in half so you can see the coffee bean inside

Milk Chocolate Honeycomb
Along with the chocolate buttons, there were these little nuggets of chocolate-dipped honeycomb. A burst of crunchy sweetness of the honeycomb with good quality chocolate coating.

Dark Chocolate Coffee Bean
These were gorgeous, and strongly flavoured. A coffee bean covered in a dark chocolate coating – the tasting guide you get does say that they are small but powerful and they are – but the dark chocolate worked so well with the whole coffee bean. Another of my favourites in the box, with an intense flavour.


For more information on Cocoa Boutique, visit their Facebook page www.facebook.com/cocoaboutique, follow them on Twitter @Cocoa_Boutique or visit their website at www.cocoaboutique.com 


Monday, 20 August 2012

Caribbean Chicken Curry with Rice and Peas

It’s Caribbean Food Week this week! The event has been launched by Grace Foods, who want to get us all cooking up Caribbean treats in our kitchens and really get to grips with the cuisine, which can seem mysterious to some, and in no way as familiar as, say Chinese or Mexican cooking. They sent me a range of spices and some tins so that I could get started and so I whipped up a Caribbean chicken curry and a generous portion of rice and peas.

I also cooked up some Jamaican Jerk Chicken, using a marinade by Encona. I just slathered it on some chicken drumsticks and thighs and baked for about 30 minutes, or until the chicken was all cooked through. The label stated that this was mildly-spiced, but my husband and the girls said it was too spicy for them. It had a tingle to it for sure, but I wouldn’t describe it as exactly fiery. So, there was more for me (hurray!).

The curry is adapted from the one on the back of the label for the Caribbean curry powder. I just simplified some of the steps and tweaked the quantities so you can make the curry and the rice and peas using one can of coconut milk – no leftover coconut milk sitting in the fridge.
 
Caribbean Chicken Curry

The curry is mild, fragrant and fairly sweet – similar in flavour to the Chinese curries you get from takeaways but with a stronger allspice kick. I used chicken thighs instead of breast, because it’s juicier and I just prefer the texture, but feel free to use breast if you like that better. The rice and peas are flavoured with a chilli (it doesn’t have to be a Scotch Bonnet Chilli but if you can get hold of one, use that), some thyme sprigs, a spring onion and the coconut milk. It’s adapted loosely from Levi Roots’ recipe which uses whole allspice berries, but I couldn’t get hold of any so used ground allspice fried with the onions. 

In short, we loved it.  I hope that if you haven’t cooked Caribbean style food before, that this inspires you to have a go. It was easy and quick to cook and we are definitely going to have this again. I just don’t know why I waited to so long to try it!

 
Jerk Chicken


Caribbean Chicken Curry with Rice and Peas
Serves 4-6

Ingredients:
For the curry:
  • 8 boneless, skinless chicken thighs, cut into bite-sized pieces
  • 1 tablespoon Caribbean Mild Curry Powder
  • 100ml coconut milk
  • 250ml chicken stock
For the rice and peas:
  • 1 small onion, peeled and chopped
  • olive oil
  • ¼ teaspoon ground allspice
  • 1 ½ pints water
  • 300ml coconut milk
  • 400g Basmati rice
  • 400g can black eyed beans
  • 4 sprigs of fresh thyme
  • 1 spring onion, cleaned, trimmed and bashed with the back of a knife
  • 1 whole red chilli (Scotch Bonnet if you can find it)
  • Pinch salt and grinding of black pepper
Method:
  1. Drizzle a little olive oil into a medium-sized saucepan (with a lid) and fry the onion until just soft but not coloured. Sprinkle in the allspice and stir gently to coat. Fry for another minute.
  2. Tip in the water and 300ml coconut milk and bring to the boil. Tip in the rice, strirring once.
  3. Drop in the thyme, whole chilli and the bashed whole spring onion. Replace the lid and leave to simmer for 15 minutes.
  4. Meanwhile, drizzle a little olive oil into a medium-sized frying pan and fry the chicken pieces. Sprinkle in the curry powder to coat and fry until just browned and almost cooked through. Pour in the 100ml coconut milk and the chicken stock and leave to simmer.
  5. The rice should be almost cooked. Drain the can of black eyed beans and tip them into the rice. Stir them through gently and leave for the last 5 minutes to warm through. Turn off the heat.
  6. Check that the chicken is cooked through. Fish out the thyme, chilli and spring onion and serve the rice and peas with the chicken curry.
 
Rice and Peas

Sound good? Do you cook any Caribbean-style foods? Which ones do you like best?

Curry chicken Rice and peas

Friday, 17 August 2012

Côtes du Rhône Wines and a Pan-Fried Venison Steak

Earlier this week, I published a blog post all about celebrating the British summer. And today I’m posting about the end of the summer. Bad timing, maybe. But with the Glorious Twelfth a few days ago, the start of the shooting season arrived and so we look forward to autumn and, inevitably, game recipes.

I grew up eating a lot of game. My Dad would often come in through the front door with a pheasant slung over his shoulder and rabbit stew with dumplings was one of the staple comfort foods of my childhood. We often ate venison, too. Game is tasty, low in fat and cholesterol and can be eaten sustainably, each year.

To celebrate the start of the game season, I was sent a couple of bottles of wine from Côtes du Rhône, which, I was told, would both pair perfectly with game. I decided to cook up a venison steak and try them out.


The first, a Château Saint-Roch (2009), was full-bodied and had a dark, peppery note to it. For £7.95 a bottle, it was bold in flavour but because I don’t drink a lot of wine normally, I couldn’t sit and just leisurely pour a couple of glasses of this for myself. It had a really rich flavour and was perfect for sipping with dinner. At the end of cooking the steak it was this wine that I used to de-glaze the pan and pour over the finished dish.


The second, a Château de la Gardine (2009) was more expensive, at £13.95 a bottle and richer in flavour still. I actually preferred the flavour of this wine alongside my steak – somehow the sharpness of the wine cleared the flavour of the meat between each mouthful, but then kept building as I ate, which added flavour to the whole meal. I loved it.


Pan-Fried Venison Steak with Côtes du Rhône
Serves 2
Ingredients
  • 2 venison steaks
  • a little olive oil
  • salt and pepper
  • half a glass of Côtes du Rhône Château Saint-Roch (or other variety)

Method
  1. If they’ve been in the fridge, take the venison steaks out to come to room temperature before cooking.
  2. Heat up a non-stick frying pan large enough to comfortably hold both the steaks. Rub a little oil into the steaks, sprinkle with salt and pepper and gently place them in the pan – it should sizzle.
  3. Cook the steaks for about 3-4 minutes on each side. This will give you very tender, medium-cooked steaks that are still purplish-pink in the middle. Adjust the times to how you like your venison.
  4. When cooked, take the steaks out and place on a warmed plate to rest. Meanwhile, slosh the wine into the pan and using a silicone or wooden spoon or spatula, scrape up any caramelised meat residues that have stuck to the bottom of the pan, incorporating into the wine. You’ll find that the wine will quickly reduce and turn thicker. Spoon some of this over the steaks and serve, with mashed potato and vegetables.


For more information about the different styles and types of Côtes du Rhône wines, visit www.vins-rhone.com 

Thursday, 16 August 2012

Federico’s Tomato and Basil Bruschetta

I have lots of memories of the people I met at university, but one person really stands out for me now I look back: Federico. He was Italian, had jet black hair, heavy-lidded eyes and could be found on the arm of a different girl each week. We shared a student house in Cranbrook Avenue in Hull, along with 6 other people, and he used to hold parties downstairs in the lounge that even the lecturers came to.

Everyone loved Federico. And he taught me a lot about Italian food. Our cupboards were full of tins of baked beans and cheap noodles, while his were packed with bottles of olive oil and tinned tomatoes. My emergency meal was cheese on toast, while his was spaghetti with chopped tomatoes, tuna and lots of black pepper. I still make it sometimes now. And I remember when he stood at the chipped kitchen worktop and showed me how to make bruschetta. The only thing I’ve changed is the addition of fresh basil, which was far too extravagant for either of us at the time. We used to use dried mixed herbs. Good old Federico.

(I made a version of this for my Gluten-Free challenge earlier in the month, using gluten-free ciabatta, if you notice it looks familiar.)


Federico’s Bruschetta
Serves 1
  Ingredients:
  •   2 slices of toasted, sliced bread, or ciabatta
  • 2 tablespoons chopped tomatoes, straight from the tin
  • 1 clove of garlic, chopped
  • salt and black pepper
  • fresh basil leaves, for scattering over
  • Extra virgin olive oil
Method
  1. Arrange the toasted bread or ciabatta onto a foil-lined grill tray. Being careful not to catch too much of the juice, take a spoonful of the chopped tomatoes and spread them, fairly thickly, over the toast. Scatter over the garlic clove (half on each) and sprinkle over a pinch of salt and pepper, mixing them all in slightly with a fork. Drizzle with the extra virgin olive oil.
  2. Rip up the basil leaves, scatter over the top, and grill for about 5 minutes. Drizzle with a little more olive oil if you like, and then eat straight away.
Do you have any recipes that, however simple, always remind you of someone?

Wednesday, 15 August 2012

Asda Fresh Produce Challenge and Win £50 Worth of Vouchers to Spend At Asda


I was contacted recently by the Asda press office, who invited me to take part in a summer challenge using some of their fresh fruit and vegetables to create the ultimate British summer dish. I set to work, my kitchen workstop strewn with strawberries, sharon fruits, asparagus, lettuce and peaches, trying out lots of summery recipes that I thought would epitomise our British summer. The idea was to choose one, that would stand out over the rest. The problem was, I couldn’t choose. My team of children (sorry, ‘taste-testers’) and I loved them all. So here’s a round up of the recipes I created – all would be great for a late summer barbecue or nibbles for a party. I hope they might inspire you to create different dishes using British (or non-British) ingredients. Here goes:

Asparagus-Wrapped Bacon

These were so simple and only took a couple of minutes to make. Wash some asparagus spears and snap them off at their woody ends where they naturally break. Wrap a rasher of streaky bacon (or half a rasher, depending on how long your asparagus spears are) around the asparagus tips and fry in a little olive oil for about 2 minutes on each side. Salty bacon on the outside and tender, green asparagus on the inside. I don’t need to tell you how amazing these would be dipped in a Cotswold Legbar soft-boiled egg. Mmmm…….

Chicken Tikka Little Gem Parcels


I’m not sure if Chicken Tikka Masala is still officially Britain’s national dish, but I love it. I wanted to incorporate the dish into a summery canapé and was inspired by the Asian use of little gem lettuce leaves as mini cups. Just cut up a chicken breast or two, and cook in a little of your favourite Tikka Masala sauce until it’s just cooked through. Leave to cool slightly. Break off the leaves of a crisp little gem lettuce and wash them – dry carefully on a clean towel. Gently spoon the cooked chicken curry into the leaves – not too much – and top with some chopped cucumber, some slices of a mild red chilli and a few fresh coriander leaves. Roll the leaves up as you eat. To my complete surprise, the children loved this. The lettuce is sweet and crisp so you could always use prawns instead of chicken or maybe a spicier curry sauce.

Pimm’s-Glazed Strawberry Tartlets


I knew, when I decided to use strawberries, that I would need to have a Pimm’s element in there somewhere. After all, I know some people who, despite the weather, don’t recognise it’s summertime until they’ve had their first sip of Pimm’s. All you do is stir together 4 tablespoons of creme fraiche with 2 heaped tablespoons of caster sugar. Spoon this creamy mixture into 4 ready-made dessert tart cases, halve some small strawberries and arrange them on top. In a small frying pan, gently heat a heaped tablespoon of strawberry jam and add in a slosh (about a tablespoon or two) of Pimm’s. Once everything has melted together and the jam is runny and hot, brush this over the strawberries, which will make them unbelievably glossy and give the tart topping lots of flavour.

Roasted Peaches and Nectarines with Vanilla Ice Cream and Fresh Raspberries


A sort of a different version of a Peach Melba. Set your oven to 200°C. Wash some peaches and nectarines and dry them. Cut in half from the stalk end to the bottom and twist the two halves, to release them from the stone. Pick out the stone from the other half. Arrange the fruit halves in a small roasting dish and sprinkle with a little demerara sugar. Roast them in the oven for about 20 minutes, until softened and sizzling. The sugar will have caramelised too, on top. Serve them, with any juices that have collected in the dish spooned over along with a handful of fresh raspberries and a scoop of vanilla ice cream.

Roasted Caramelised Sharon Fruits


Sometimes you see a fruit or a vegetable that you’re not sure what to do with. For me, sharon fruits are one of these. So I decided to roast them, like the peaches above, with just a little demerara sugar. They turn really soft and fragrant. Just cut them in half and arrange in a dish. Sprinkle with a spoonful of demerara sugar and roast at 200°C for about 25 minutes. Eat them by scooping out the flesh with a spoon, leaving the skin behind. You’ll find that the flesh comes awayin segments. I find the flavour of a sharon fruit similar to a sweet clementine, but with the fragance of a mango. Lovely.

For more recipe ideas, check out the Asda Get Cooking App on Facebook and upload your own recipes and photos!
And that’s not all…

Asda have agreed to give away £50 worth of Asda vouchers to one lucky Comfort Bites reader. To be in with a chance to win, click on the rafflecopter widget below and follow the instructions.

Rules:
  1. The giveaway is for £50 worth of Asda vouchers.
  2. The giveaway is being arranged by Asda and their decision is final.
  3. This giveaway ends on 16th September 2012. One winner will be chosen at random via Rafflecopter. The winner will be contacted by email, Facebook message or via Twitter within a few days of the end of the giveaway. If the winner does not reply within 2 weeks of the end of the giveaway, the voucher will go to another winner, also chosen at random. (So please check your inboxes!)
  4. The giveaway is only open to UK residents.
I hope you enoyed the recipes, and good luck!

a Rafflecopter giveaway

Tuesday, 14 August 2012

Walkers Launch New Deep Ridged Crisps


I was contacted by Walkers recently, who asked if I wanted to be one of the first people to try their new range of Deep Ridged crisps. These crisps have much deeper ridges than other ‘crinkly’ style crisps – actually twice as deep. 

A sneaky peek at the Deep-Ridged crisps in the bag… mmmmmm flame-grilled steak…

I got to try the flame-grilled steak flavour, salt and malt vinegar flavour and cheese and onion flavour. My favourite, out of all of them, was the flame-grilled steak, which was especially beefy and smoky. The mature cheddar and onion crisps were big on flavour and had little green speckles. And the salt and malt vinegar flavour had that real deep malt vinegar taste without being so sharp that – as my mother says – “it makes your mouth curl up”. I’m not normally a huge salt and vinegar crisp fan, but I’d have a bag of these any day. 


The Range: Salt and Malt Vinegar, Flame Grilled Steak and Cheese and Onion

One of the main differences with these crisps and the other crinkle-type kinds of crisp is that you often find they’re much thicker. Not these. They’re still fairly thin – thicker than your normal Walker’s crisp of course – but they do still have a lot of crisp crunch.

See that? Epic satisfaction…
 

In short, I loved them. And they do taste like they’re a really good quality crisp. For more information, visit the Walker’s website or follow on Facebook. 


Check out those ridges…
 

Have you tried these new Deep Ridged Walkers crisps? What did you think?

LinkWithin

Related Posts Plugin for WordPress, Blogger...