Tuesday, 31 July 2012

Making Sense of Sensitivity Campaign: I Go Gluten Free for 5 Days

I was contacted recently by the people at Dr Schär to see if I would like to take part in a campaign to raise awareness of gluten sensitivity. It’s thought to affect around 6% of the population and many might not realise their headaches, bloating and topsy-turvy digestion are as a result of sensitivity to gluten. And those that know they have a sensitivity might not bother to change their diet because eating a gluten-free diet might be perceived as complicated.  

For the campaign, I need to go gluten-free for five days, in an effort to show you that it can be done. This excited me for one main reason. I was at a barbecue a couple of years ago, when one of the host’s friends turned up and casually mentioned that she couldn’t eat any bread rolls because she was sensitive to wheat. This sent everyone into a panic, checking the labels of burgers, sausages and coleslaw tubs to see if they were gluten-free. Having researched into the condition a little bit more, I realise they really didn’t need to panic. There are loads of foods you can eat while on a gluten-free diet.

Over the weekend, I made a start and Sunday was my first day eating completely gluten-free.
Here’s a video of me talking more about the campaign and how I got on for my first day. (I say ‘um’ a lot when I witter on to a camera because it feels weird but I’ll get used to it!)…


So, my meals for day one were as follows:

Breakfast:
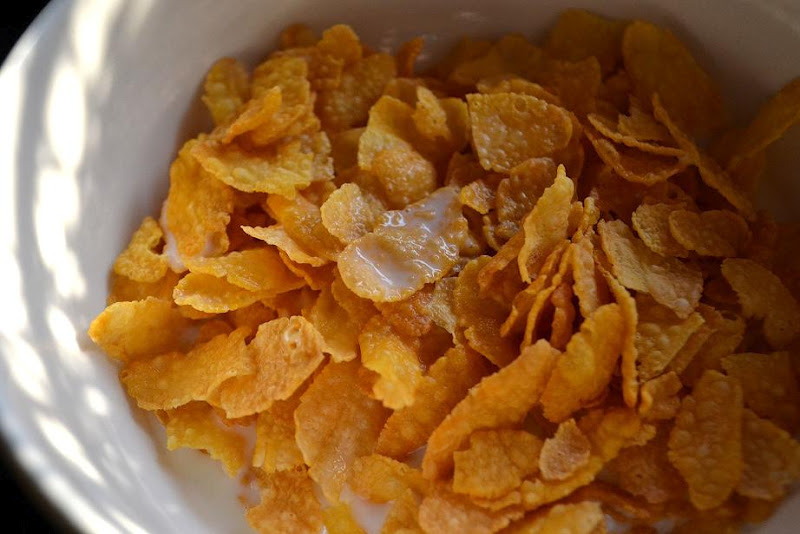
gluten-free cornflakes (Dr Schär) with semi-skimmed milk
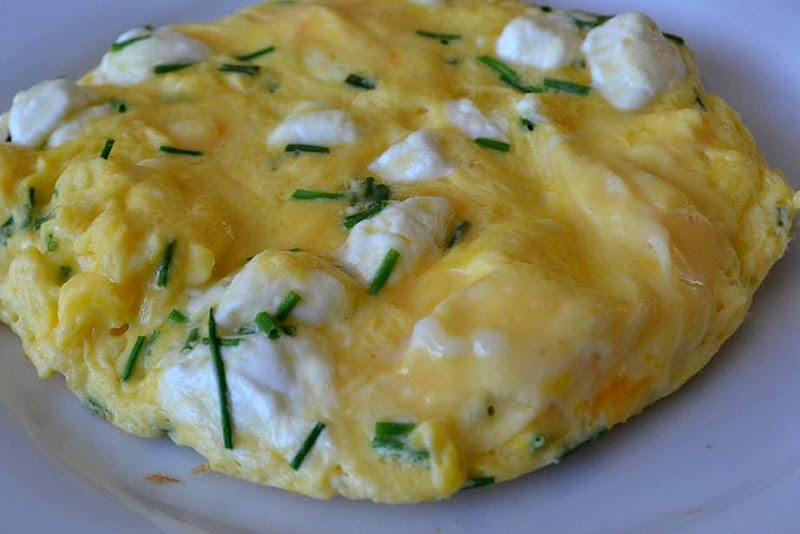
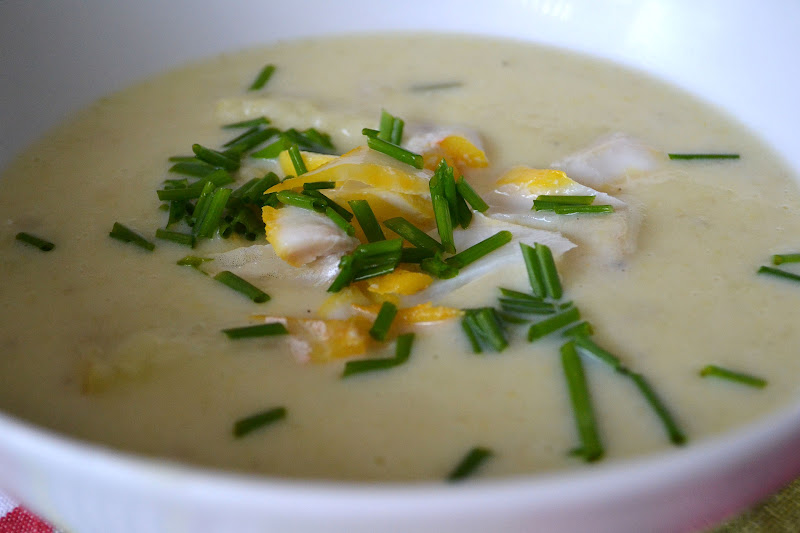

Lunch:
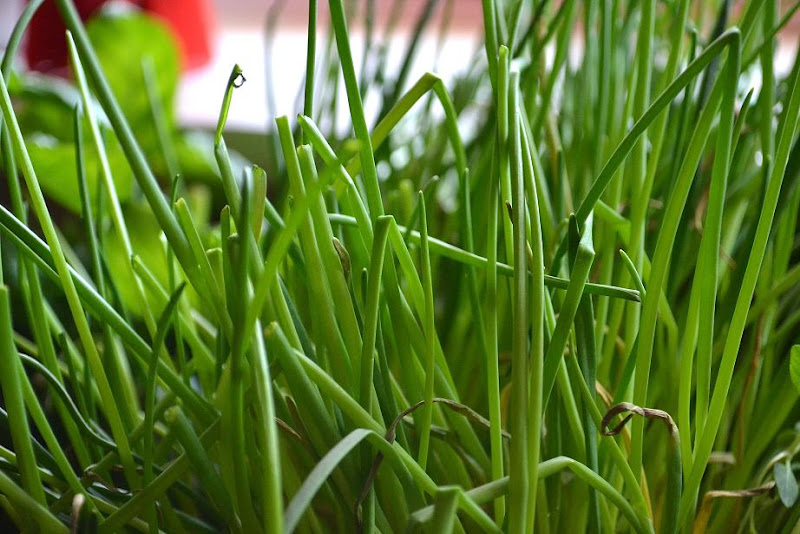
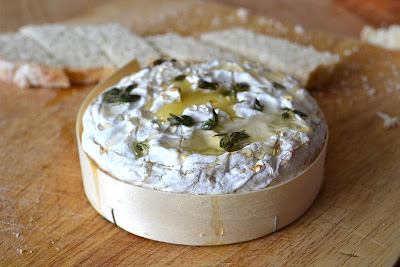
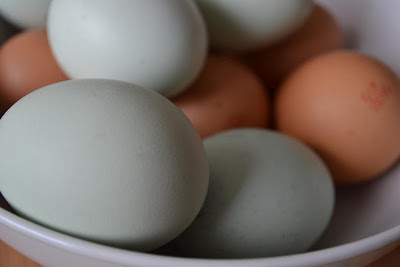
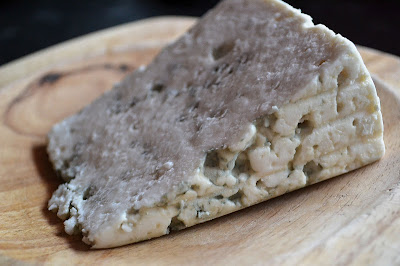
Goat’s cheese and chive 3-egg omelette (very filling, so didn’t need to fill up on breads, etc) and it also kept me going until dinner time in the evening.
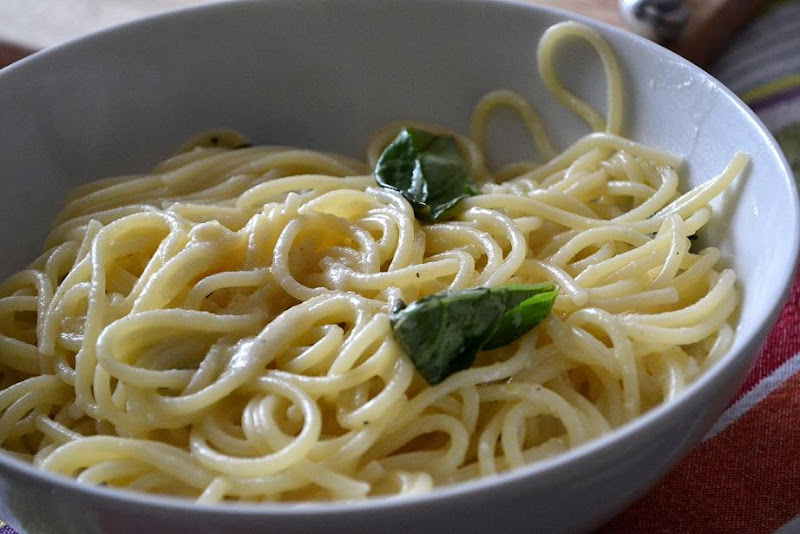

Dinner:
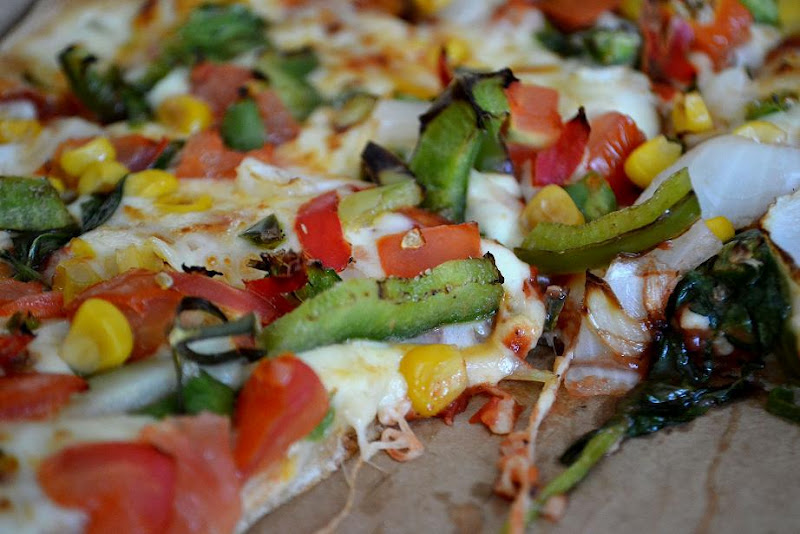
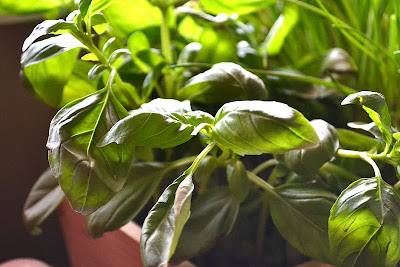
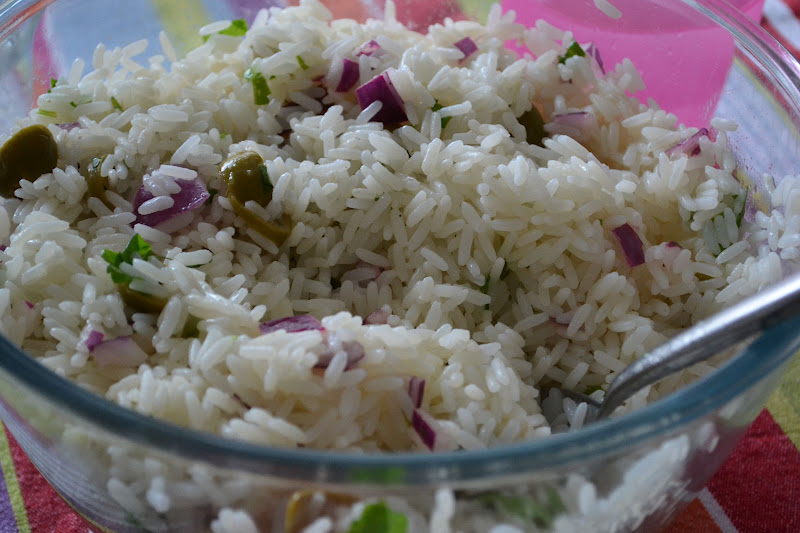
Gluten-free spaghetti with tomato, basil and mozzarella sauce.


Snacks:
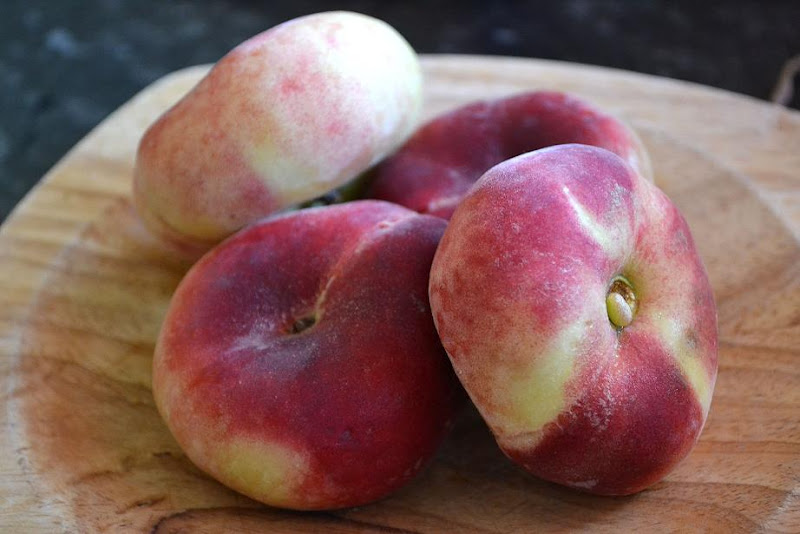
Fruit (banana, apple – whatever I had handy) and some natural yoghurt with honey swirled in.

I’ll be posting my daily diary on here (most likely in video form) so do check back to see what I’ve been eating each day. And if you are sensitive to gluten in your diet, I hope that it will show you that you can still enjoy a wide range of foods and maybe inspire you to try some different dishes. All the recipes I use during the challenge will be posted up onto the blog soon.


Thanks for reading and watching, and wish me luck for the rest of the challenge!


Are you sensitive to gluten in your diet? Do you have any gluten-free tips or recipes I could try while I’m on the challenge? Let me know in the comments box below…


Friday, 27 July 2012

The FSA’S Play It Safe Campaign: Do YOU Take a Risk with Fast Food?

The Food Standards Agency have been touch with me about the findings of a new survey they’ve conducted, and I thought it would be good to share it with you.

According to the study, three quarters of us take a risk with food safety when we’re eating on the go. This might mean that we are more at risk of food poisoning. This worries the FSA, as the findings were announced just ahead of the Olympics, when higher numbers of people will be watching the games and grabbing a bite to eat at one of the many vendors at the different sites.

The survey also revealed that 27% of people said they were more likely to take a risk with food safety after a night out, and 15% said they were more likely to take a food safety risk at a sporting event, which makes the Olympics very relevant right now. A huge 26% of people also said they were more likely to overlook food safety risks when on holiday. And bearing in mind we’re going to be getting a lot of visitors coming into the UK this summer – and it’s the school holidays, it could mean trouble.


The FSA says that they’ve worked hard to make sure there’s little chance of a food poisoning outbreak this summer during the Olympics…. but it doesn’t mean you should take a risk with fast food….

It also seems we’re misguided over what actually causes food poisoning. Of the people questioned, the highest proportion (12%) thought you were most likely to get food poisoning from Indian or Asian foods, while only 0.7% thought you could get it from Italian food; whereas in actual fact, food from any world cuisine can give you an upset tummy.  

The same goes for which ingredients cause food poisoning. When asked which food people trusted the least in terms of food safety, most people (40%) replied raw fish and shellfish. 23% said cooked shellfish and 9% didn’t trust formed processed meat. The food with the least mistrust went to ice cream (1% of people) – which, if thawed and then re-frozen can actually cause quite a nasty stomach upset. What was interesting, is that rice, which ranked fairly low on the list, is thought to be responsible for many of the food poisoning cases in the UK because in many takeaways it’s cooked and then reheated before serving. And if that rice is sitting around and not refrigerated and then not heated through properly before serving then you’re not going to be a happy camper after your chicken balti.

So, in light of this research, and that the Olympic and Paralympic games are just around the corner, the FSA have released a checklist showing you how you can look after yourself and reduce the risk of food poisoning if you’re eating out and about this summer (whether you’re going to any games or not).

The FSA Guidelines on Playing It Safe this summer: 
  • Always wash your hands with soap and water before eating, touching or cooking food. If you’re not sure if there are any washing facilities where you’re going, consider taking a pack of wipes or some anti-bacterial hand gel (you can pick these up at supermarkets and chemists).
  • Outside of Olympic venues, have a look to see if you can see any food hygiene rating stickers on the door or walls of a takeaway or restaurant.
  • Use your common sense. Does the place/van/kiosk look clean? Can you see both raw and cooked foods on display, and are they being kept separate? When you finally receive your food, check it’s piping hot and cooked all the way through before you eat it.
And remember – if you’re ever in doubt about the food you’re about to eat, don’t take a risk – go somewhere else.

Sarah Appleby, Head of Enforcement at the FSA stressed that: “we hope that out advice to the public and the work we have been doing with our local authority colleagues to support businesses will make a food safety incident highly unlikely. However, if you do fall ill with suspected food poisoning, report it to your doctor or local council and they will take the appropriate action.”

I’m often reassured when I see people preparing food wearing those plastic gloves when I’m out and about – and athough even in the fanciest of restaurants there could be a chance you might get food poisoning, it’s good to know that there are steps you can take to reduce those risks. Just keep your eyes peeled and use your common sense when eating on the go.

Do you ever take a risk? Are you surprised about the findings of this survey?

If you want to find out more about the Play It Safe campaign, visit www.food.gov/olympics

Thursday, 26 July 2012

Review: Domino’s New Mexicana Stuffed Crust Pizza


You’ll remember that I didn’t have the best experience with Domino’s, when I was asked to try out their stuffed crust pizza back in September last year. And so when my 7-year old asked if we could order a pizza one lunchtime as a summer holiday treat I was reluctant. But I caved in, and decided to order the new Mexicana stuffed crust pizza that Dominos have just brought out. I was also interested to find out if anything had changed since I complained to the store last time about a lukewarm, chewy, tasted-of-nothing-in-particular pizza. And, to my surprise, it had.


My veggie Mexicana was piping hot and the crust was packed full of cheese, which actually tasted mildly of garlic and had little pieces of red and green chillies tucked in there. The pizza itself was heaving with the vegetable toppings – just the way I like them; lightly charred in the oven, but still crunchy and juicy. Check out the pic below… I think I even got more topping on my pizza than it’s showed in the ad, which is a first.


What I didn’t have, was the sour cream topping. I unchecked it from the list as the thought of sour cream on a pizza kind of put me off. I did get a little tub of garlic and herb dip with it, which was great as the pizza cooled down and the crusts became a little drier and chewier, to dip into.  But I really enjoyed eating it. The veggies – red and green chillies, green peppers, fresh tomato, spinach and sweetcorn – were tasty and moist and to be honest, for a pizza called a ‘Mexicana’ I did expect a little more heat. But most of that was in the chilli-flecked crust.


I was glad that my confidence in Domino’s has been restored – perhaps as the customer service lady said last time, I’d had a bad experience. But, from this one, I would buy the Mexicana again. I’d just have a bottle of hot sauce handy next time.

Have you tried the new Mexicana from Domino’s? What did you think? 


Tuesday, 24 July 2012

Feng Sushi Team Up With Taywell to Create Ice Creams with Asian Flavours

If you’re a fan of fancy ice creams then you’ll love this. Artisan ice cream maker Taywell and Japanese restaurant group Feng Sushi have collaborated to create a range of interesting dessert flavours, such as Kaffir lime leaf and coconut ice cream, sweet chestnut ice cream and dark chocolate and wasabi ice cream. Other flavours include Matcha green tea ice cream, and a blood orange sorbet.


Silla Bjerrum, managing director at Feng Sushi said that she was impressed by Taywell and the quality of the new ice creams: “I was impressed by everything Taywell has to offer,” she said in a statement. “Firstly, it uses local milk and 40% cream – the next level up from double cream – with egg yolks to achieve an exceptionally smooth texture. Taywell uses only natural sugars and 100% fruit, as well as the highest quality Belgian chocolate, coffee and nut oil. In addition, it uses only 12 to 15% air. Cheaper brands can use up to 250% air to bulk out their products.”

Both brands pride themselves on their commitment to quality and sourcing sustainable ingredients. You can find the ice creams in Feng Sushi restaurants, around London. For more details, take a look at the Feng Sushi or Taywell websites.


Monday, 23 July 2012

5 Ways with Chives, Thyme and Basil in Your Everyday Cooking

The Fresh Herb Company is the UK’s largest producer and supplier of fresh herbs to the UK retail market, and they’re running a campaign at the moment to change our perceptions of herbs and show that they can be used for all manner of everyday dishes and not just sprinkled into fancy ones for special occasions.

It’s all very well to know that you can use thyme in a cheese soufflé or coriander in Thai crab cakes, but how many of us cook these for everyday family meals? So last week, with bright, perky leaves of thyme, basil and chives sitting on my kitchen worktop, I set about using them in every day meals and snacks. Here are some of the ways I used them. I hope that it might inspire you to use them in a similar way, and add them to basically everything that you cook.


Chives
I love chives, and remember walking the dogs with my Mum and sister and taking along a carrier bag and a pair of scissors and picking them in the wild. They give a mild oniony flavour and little specks of bright green colour to loads of dishes.
For example:


  • Snip chives into a creamy korma – they’ll give off their fresh fragrance as soon as they hit the hot sauce.
  • Snip into stir-fries, such as Pad Thai – don’t be tempted to leave them in long strands though, no matter how good you think it will look – they need to be snipped into 2cm long pieces so you can eat them easily.
  • Sprinkle them in to mash, or just scatter into a pan of buttered new potatoes.
  • A childhood favourite of mine was cheese on toast scattered with chives. They go so well with cheese, especially soft cheese. Sprinkle into sandwiches, salads and baguettes and don’t forget them in toasted sandwiches as well. I’ve also snipped chives onto tuna mayonnaise and made sandwiches or baked potato toppings.
  • Chives are also great stirred into sour cream and used as a dip for potato wedges.

Thyme
Thyme is a fragrant, woody herb with twisted little sprigs that you can snip off and add to dishes. You can either drop in the sprig whole to add flavour to soups and stews or pull off the tiny leaves and sprinkle them into dishes.


  • Thyme works very well with beef and so drop sprigs into beef stews or into meat pies so that it can infuse its sweet fragrance.
  • Toss new potatoes with thyme sprigs, olive oil and salt before roasting
  • Thyme is great with cheese, especially soft cheeses. Scatter some sprigs and poke them into the rind of a whole camembert or brie, drizzle over some honey and bake until soft.
  • Next time you’re boiling some carrots, add in a drizzle of extra-virgin olive oil and a few thyme sprigs. They will add flavour and richness.
  • Scatter some thyme sprigs over chicken portions before roasting. You’ll be surprised at how much of the herb’s flavour will absorb into the chicken, especially into the skin.

Basil
Basil, along with parsley, is a herb I use constantly in the kitchen. It has delicate, bright green leaves that are very sensitive to being crushed (they’ll go black and floppy) or the cold (they’ll also go black and floppy) so don’t store them in the fridge. Tear up basil with your hands – don’t chop – and you’ll release more of the important oils that give them their distinctive, sweet and peppery flavour.


  • Basil is traditionally paired with tomatoes and they do work very well together. Make up a tomato and mozzarella salad and sprinkle over some basil leaves, rip up a few into a tomato soup and also into tomato pasta sauces.
  • Add to sandwiches – sometimes I use herbs in the same way I would use salad leaves. A few basil leaves in a sandwich will add freshness and a burst of flavour.
  • Basil has recently been used more and more in desserts. Try them with strawberries – James Martin has a recipe for basil with strawberries and a balsamic vinegar reduction. If you don’t feel as cheffy as that, just use it for inspiration for trying with sweet dishes too.
  • Basil works really well with lemon. Scatter torn basil leaves into lemon juice, olive oil and grated parmesan for a quick pesto to toss hot, drained pasta into.
  • Once you’ve made your own pesto with basil, pine nuts, Parmesan and olive oil you’ll never buy jars of it from the supermarket again. You could also blitz up basil with some tomatoes, lemon juice and olive oil and use it as a marinade for chicken.
For more information on fresh herbs, including some celebrity chefs’ ‘5 Ways with Fresh Living Herbs’, visit The Fresh Herb Company website

How do you use herbs in your everyday cooking? What herbs can’t you be without in the kitchen?


Friday, 20 July 2012

Raspberry and Sesame Seed Flapjack

I love flapjacks – they’re easy to make, and when you do make them you can knock up quite a big batch that will see you all through the week; in lunchboxes, snacks and for little desserts for the kids. You can add choc chips, nuts, seeds or dried fruit to them – but I love to sprinkle in some frozen berries. They add moisture and sweetness and a burst of colour. I usually sprinkle sesame seeds over any flapjack I make to add crunch.

This recipe makes quite moist, chewy flapjacks – if you like them more brittle, just cook it for a bit longer or push into a wider tin, so they end up thinner. You can use whatever frozen berries you have handy – I bet they’ll be lovely with blueberries, too – but these raspberry ones are great with a cup of coffee.


Raspberry and Sesame Seed Flapjacks
Cuts into about 25 pieces

Ingredients:
  • 200g rolled oats
  • 300g light brown muscovado sugar
  • 300g plain flour
  • 3 tsp baking powder
  • 200g unsalted butter
  • 3 tablespoons golden syrup
  • 150g frozen raspberries
  • 1-2 tablespoons sesame seeds

Method:
  1. Preheat your oven to 180°C, and line a 23cm square tin with greaseproof paper.
  2. Next, melt the butter in a saucepan and trickle in the golden syrup. Stir to combine and put to one side.
  3. Tip the dry ingredients (not the raspberries) into a large mixing bowl and mix lightly together. Save a small handful of the frozen raspberries and tip the rest into the bowl, stirring gently until they are all mixed in.
  4. Pour in the melted butter and syrup mixture and stir until all the dry ingredients are coated in the butter. 
  5. Press the flapjack mixture gently into the lined tin and use your hands to give it an even surface. Sprinkle over the remaining frozen raspberries, breaking them up as you go, and then scatter over the sesame seeds.
  6. Bake in the oven for 25-30 minutes, or until golden brown and cooked to your liking.


Do you have any favourite flapjack recipes? What do you add to yours?

Thursday, 19 July 2012

Why Food Education is Needed Now

Pork wings, anyone?
In a survey to mark National Butcher’s Week last year, it emerged that almost a quarter of people questioned believed that they could go into a butcher and ask for a bag of chicken chops and some lamb drumsticks. 20% would ask for a leg of liver and – this is the funniest (or the saddest, I haven’t decided yet) – 17% thought that you could buy pork wings.

I was talking to a lady from a PR company the other day, who also reminded me of another survey, this time conducted on behalf of LEAF (Linking Environment and Farming). It found that one third of young British adults (aged 16-23) didn’t know that eggs came from hens and only half knew that steak came from cattle – some believed that it came from wheat or maize. (I can’t even begin to figure that out).  Others didn’t know that bacon came from a pig.

And then I remembered another survey of youngsters from a few years ago who couldn’t identify a potato, a head of broccoli or a bunch of carrots. And then my brain melted, and I couldn’t think anymore.  I did remember a chat I had with a budding young chef, who worked in a restaurant kitchen. He was 16 – had left school – and he leaned towards me and whispered conspiratorially: “do you know, they even put BONES in the stock.”

Lamb cutlets from the butcher… NOT pork wings…

It’s easy to laugh and point the finger but really, this is actually quite scary stuff. I find it incredible that people will look up the latest celeb gossip or find out what happened on Eastenders but when it comes to the food they are putting in their mouths, some seem to be quite clueless. How can people make informed decisions about animal welfare, farming practices, choosing different cuts of meat and considering sustainability if they don’t know what real food is?

What happened?
While I was growing up in the 1980s, clues to where our food came from were everywhere. My Mum would go to the local butcher, where rabbits hung on hooks behind the counter alongside pig carcasses and feathered pheasants. We kept birds in the garden: geese, ducks and hens – and used to scrabble around hunting for eggs in the morning. I used to de-pod broad beans with my grandmother; my sister and I sitting on her lounge floor in front of the fireplace, shelling the plump, pale beans into a metal bucket.

These were the days before many of the big supermarkets, when everyone bought from greengrocers, bakers and butchers and everything closed on a Sunday. There were a few supermarkets, but they were small – more like large corner shops really. I’m not sure if it’s fair to blame the supermarkets entirely but I do sometimes wonder what packing generic cuts of meat in generic plastic wraps has done for society. And don’t even get me started on forming chicken meat into dinosaur or fish shapes. We have less of a link now between the farms, producers and the consumers and I’ve even seen some people that are even afraid to touch raw meat or fish and get all squeamish about it.

And when I think of school trips and family days out, it was often to a farm or a walk along the river, where we could watch fishermen heaving up glistening trout lashing about on the ends of their hooks. Nowadays I think people are more likely to take their children to amusement parks or holiday resorts. It’s as if we take food for granted now, and there’s no fun in it.


What we can do
I think what is really important is that we need to start now and teach our children. It’s not just down to the schools. Because of mass production and cheap food, we’ve lost a sense of how valuable food actually is. Ironically enough, as we see every day on the news, food prices are rising – some quite drastically – and local shops are closing. And still we gorge on cheap pizzas and chicken nuggets. Visit your local butcher for your meat – watch him sawing chops off a rib cage. It’s easy to be squeamish, but if you’re going to make the decision to eat meat, I think it’s only right that you take the responsibility to find out where it comes from. It can be as simple as giving children exposure to real food while you’re out and about – it won’t take any extra effort.

The population has risen by 3.7 million people in just 10 years, in England and Wales alone. Imagine what it’s doing elsewhere in the world. We’re all living longer and having more children. Even David Attenborough voiced concerns this week about how we’re going to feed the world if things continue this way.

Ours and future generations need to be educated about where food comes from, respect how much of a valuable commodity it really is and make some tough decisions about the environment and animal welfare. Not just continue to stuff cheap food down our necks as long as it lasts and then, like ostriches with their heads in the sand – panic when famine hits.

What do you think? Is education about food key when it comes to feeding future generations? Are you shocked by the statistics? Share what you think below…

Wednesday, 18 July 2012

Food Festivals – A Few Thoughts and Tips


This time of year in particular is awash (in more ways than one) but mostly with food festivals. And having attended my fair share of them over the years, I thought I’d put together some suggestions of things to consider if you’re off to a food festival and it’s your first time.
 
Some of these points might be obvious but they’re all things I’ve learned and mistakes I’ve made along the way. Hope they’re useful.
 
Plan ahead
Sounds obvious, but you’d be surprised. Check your transport options a few days before so you know what time you can travel (cheaper train tickets don’t let you travel at peak busy times) and how you get from the station to the event. Some tickets are cheaper if you book in advance anyway, and if you are travelling a long way and you anticipate it to be busy, you can always reserve a seat on the train. Remember too, that some festivals are held in fields that can be far away from the main town, so take some cash in case you need a bus or taxi.
 
Take a bag
It doesn’t have to be glamorous, a bag you use for your grocery shopping will do. You’ll probably get given samples to take away (if you’re lucky), as well as leaflets, catalogues and a festival guide. You’re also bound to be buying lots of goodies as you go round. I’ve seen so many people at these events uncomfortably cradling all their stuff in their arms as they walk round. Just take a bag. Festival bags are often available but they can be expensive to buy.
 
Take out cash before you go and consider the cost of lunch there
I got stuck at one food festival once when I had £15 cash. Once I’d paid my bus fare and bought lunch I had nothing left to buy goodies with – and there wasn’t a cash machine in sight. You might get lucky and find a stall that takes cards but usually, they don’t. Sometimes cash machines are available but there will be queues due to high demand, and some machines charge you for withdrawals. Also bear in mind that a jar of gourmet curry sauce can cost around £4-5 and a hot dog about £3.50 at least. Maybe take slightly more than you think you need, if you can afford it, to take lunch and drinks into account.
 
Take a camera, even if its the camera on your phone
Food festivals are great places to spot and even meet celebrities who are usually happy to have a quick chat and maybe have their photo taken with you. Take a camera and charge your phone – otherwise you might miss a photo opportunity!
 
Dress comfortably
They might look nice, but eight-inch stilettos might not be the best footwear for a food festival. There’s usually a lot of walking and sometimes it’s outside in a field. And always dress according to the weather!
 
Get there early in the day, if you can
I love getting to food festivals just after they’ve opened. It’s a great way to wander round and chat to the producers before things get busy. I find they’re much more willing to talk to you about how they make their produce and where it’s from than when they’re busy with customers later in the day.
 
and finally…
 
 
Check the show’s website before you go
Sometimes, celebrity guests or guest speakers and demonstrations are announced at the last minute. Check the timings and events on the day, before you set off so you know what you’ll be going to do. Don’t miss out on a favourite chef demo because you left the festival early and found out about it when you got home. That’s really annoying.

What are your tips for people going to food festivals? How can they be better prepared?


Tuesday, 17 July 2012

July BSFIC: Condensed Milk Vanilla Ice Cream

The theme for this month’s Bloggers Scream for Ice Cream challenge is condensed milk. Now I’m used to whipping up ice creams from double cream, milk, eggs and sugar – but there are actually a few bonuses for making it with condensed milk:
  1. You don’t need an ice cream maker, as whipping the cream beforehand incorporates air, making it fluffy and silky.
  2. The condensed milk adds a slight toffee-ish quality to the finished ice cream, which is especially delicious and gives it an interesting twist.
  3. Because you’re using thicker, condensed milk instead of just milk, your ice cream ends up super-thick, really decadent and no match for the ice creams you buy from the supermarket freezer.
  4. Because you are not pouring warmed milk over raw egg yolks, you don’t have to worry about things like eggs scrambling; you don’t even need to turn on the hob. And for anyone worried about eggs, the recipe doesn’t contain any!
Give it a try – the recipe below makes a largish tub – about 600mls at least. And because it’s richer, you need less of it. Or that’s the theory anyway.


Because of the flavour of the condensed milk, I decided to make my ice cream with a vanilla flavour. We often pass vanilla ice cream off as something to go with apple pie or in a milkshake but we often don’t refer to it to be enjoyed in its own right, as we do say, chocolate or strawberry ice cream. But this just goes to show that if you use quality ingredients, even a very basic-flavoured ice cream can be enjoyed without any of the other embellishments. I wanted the toffee flavour of the condensed milk to come through, and here it really does. I hope you like it.

Super Thick Vanilla Ice Cream

Ingredients:
  • 397g can condensed milk
  • 300ml double cream
  • 300ml extra thick double cream
  • 1 vanilla pod
Method:
  1. Pour the double cream and the extra thick double cream into a large bowl. Split the vanilla pod in half and scrape out the seeds, adding these to the bowl. Save the empty pod for flavouring your sugar, don’t waste it!
  2. Using an electric whisk, whisk the cream and vanilla seeds until the cream thickens, but before it reaches stiff peaks.
  3. Pour in the condensed milk and whisk again for a few minutes, just until it thickens again.
  4. Pour and scrape the mixture into a freezable container and freeze for at least 3 hours, or until firm. Take out of the freezer a few minutes before serving, so it becomes scoopable.


Have you ever made ice cream using condensed milk? How was it? What did you make?


Monday, 16 July 2012

Chinese Hot Dog Buns

I recently wrote an article on Yahoo! Lifestyle about hot dogs from around the world, and while I was researching the different types, I came across the Chinese version. The franks are baked inside a fluffy, milky dough and although they look difficult to make, they’re actually very simple. The only problem is, you can’t make them quickly (you need to allow for about 3 and a half hours, what with all that rising time).


I fell in love with them at first sight. I think it was the way the dough takes on a cute, pillowy appearance after rising, giving you three bumps. And then the frankfurter just peeps out from you as if encased in a big, bouncy duvet. I love them.


The recipe I used was this one – but I did have to add quite a lot of flour to the dough, because it was quite sticky. And then when I added the butter the whole thing seemed to stick together in an oily mess so it needed a little more flour to bring it all together. But apart from that, the recipe was spot on.


Judging from the nostalgic posts on message boards about these, it seems that many people remember them as treats when they were children. While they’re not quick to make, they are definitely simple and if you love hot dogs I’d urge you to have a go yourself. Keep a couple in the fridge for packed lunches or an instant snack.


Have you ever tried one of these? Do you think you’ll make them?

Friday, 13 July 2012

Flat Peaches!

These are the sweetest, juiciest peaches I have ever eaten. And they’ve stirred up quite a craze this summer with people Tweeting pictures of them and generally talking about how lovely they are.


I received mine from Abel and Cole, and although at first they looked a bit like they’d been sat on, I was really keen to try one. Firstly, they’re easier to eat because of their shape. The juice doesn’t dribble down your chin so much because they’re just the right height that you can bite whole chunks off comfortably, nibbling around the central stone. They are also really sweet and very juicy. I nestle them into my children’s lunchbox, which they love – mainly for their cool flying-saucer shape although also because they’re not as messy to eat. 

These flat peaches come from Spain, and although we’re all getting excited about them now, Abel and Cole say on their website that they’ve been around since the 1800s. If you can get hold of them, please do try them. I’m sure you won’t be disappointed.

Have you tried these flat peaches? What did you think?

Thursday, 12 July 2012

How to Make the Best Burritos

Burritos, fajitas… we love them. The girls take mini versions to school in their packed lunches, and it’s usually the first thing we look for if we’re out shopping and we’re hungry. 

A good burrito at lunch will see you through the rest of the day easily. But they can be pricey, especially if there are 4 or 5 of you eating together, as we often are. I still pop into my local burrito place from time to time, but I’ve started making them more regularly at home. Forget those burrito kits you can buy in supermarkets. Choose your ingredients carefully, forward-plan a little and you can enjoy burritos at home that are just as good as in the shops. And here’s how I do it.


The Pork
Buy the best quality pork you can afford. Free-range, if you can. Cheaper cuts tend to be more flabby and fatty and you can lose out in the end. And I always use pork shoulder and slow cook it in beer for my burritos. The shoulder of the pig is well used by the animal and so it’s muscular and full of flavour. The beer gives the pork a savoury, malty flavour and during the long, slow cooking the meat becomes so tender you just need to shred it with a couple of forks. You can always add other ingredients to the cooking water, such as chillies, orange zest or herbs. To slow cook it, you need to have a little forward planning (this is no last-minute meal solution, unless you have some leftovers in the fridge) but it will be worth it in the end. You can, obviously, use any leftover cooked chicken too, preferably dusted with a bit of spice or doused in a little hot sauce.

The salad and veggies
You need something crunchy. Forget those floppy, wispy salad leaves you get in puffy, aerated bags in the supermarket. Buy an Iceberg or Romaine lettuce and wash, trim and slice it. This will add texture and moisture to your burrito. If you’re using veggies, lightly pan fry some sliced red and yellow peppers and onions and add them to your fillings.


The rice
I always try and use Basmati rice in my burrito. I love its fragrance along with the pork and the other ingredients. For me, the rice has to be still warm – that’s where all the flavour is, so cook it last. When I don’t have any Basmati I have used standard long grain rice but it’s just not the same and the grains seem to be more slippery and tumble out of the wrap. You can always cook your rice with chopped coriander leaves for more flavour, if you like.

The beans
If you don’t have beans in your burrito, then it’s not a burrito. It’s a fajita. And for me, it’s pinto beans all the way. Don’t bother with those tins of refried beans that you get in the supermarket – they don’t taste right (at least I don’t think so). If I can’t get pinto beans I buy a tin of adzuki beans, drain them and fry gently in a little olive oil and a chopped garlic clove. Within a couple of minutes they’re soft, slightly mushy and ready to spoon into your burrito.

The salsa, dressings and cheese
So you’ve got your rice, beans, meat or veg on. Now the fun begins. You’ve got Pico de Gallo, which is a fresh-tasting salsa made up of chopped tomatoes, cucumber, onion and coriander. Or, you can dribble over some home-made guacamole (a couple of mashed avocadoes, lime juice and sea salt), or go for mild, medium or hot salsa. It’s up to you. Sour cream is also good in your burrito. I’ll be honest. I usually go for at least 3 different types of dressings or salsa. And don’t forget the cheese! If you can squeeze any in, make sure it’s something like a mild Cheddar. It adds creaminess and texture more than a sharp, cheesy flavour. And while you’re eating, you do really need a bottle of Cholula hot sauce to shake over for that extra heat.


The tortilla wrap
Always, always, always heat your tortilla before you start wrapping your fillings up in it. This will keep the rest of the ingredients warm, especially if you then wrap it all up in some foil which keeps the heat in and stops everything falling out of your wrap (which should be pretty huge by now). To heat your tortilla, just heat a dry frying pan, slap in the tortilla wrap and leave to heat for about 10 seconds on one side, and then flip it over for another 5-10 seconds on the other side. Don’t skip this step – I’ve made it with wraps straight from the pack and you can’t taste much of it – and they’re more likely to crack too.

The wrapping
This is where I wish I’d made a video. But it’s still easy. Just tear off a piece of foil, about the same size or slightly larger than your tortilla wrap, and lay it out on the kitchen worktop. Place your tortilla wrap over the top. Spoon in a couple of tablespoons of warm rice, then the shredded meat and/or veg and then beans. Dribble over your salsas, scatter in the salad and grate in the cheese. Fold in the ends of the tortilla wrap to your left and right, just to help when wrapping it all up. Use these ends with the pads of your fingers to squish the fillings around inside the tortilla so you get a bite of everything as you eat. Once everything is pretty well combined, fold these ends in, and, with the foil underneath fold the top of the wrap over your (now huge) burrito filling. Roll up, using the foil to keep it altogether. Unravel the foil at one end and eat.

What are your secrets to the perfect burrito?

Wednesday, 11 July 2012

Bill Granger’s Prawn Skewers and Rice Salad

I never thought I would see my 4-year old daughter gripping curled up, pink prawns between her teeth and tearing them off a wooden skewer. Well, not yet. And my 7-year old loved them too. The recipe is Bill Granger’s, from the book Bill’s Open Kitchen, and consists of just mixing raw prawns, parsley and lemon zest with some breadcrumbs in a bowl and threading them onto wooden skewers. A quick blast under the grill and they’re done. And they were so full of flavour and still juicy. This is my new favourite way to eat prawns; and I’m not a big seafood lover. True, a lot of the breadcrumbs fell off but no one complained.


The rice salad that comes with it is basically rice (the recipe states to use short grain rice, but I didn’t have any) mixed with lemon juice, chopped green olives, raw red onions and herbs. It had a fresh flavour and paired perfectly with the succulent prawns. I can’t find a recipe online but I just had to tell you about it. If you have this book, do give this recipe a go. We loved it. And for the kids, it makes a change from fishfingers.


What’s your favourite way to eat prawns? Do you also know any children who like seafood? 

Tuesday, 10 July 2012

Rhubarb and Vanilla Jam

I love rhubarb. But one thing I always think of when I see it is vanilla. I think it comes from growing up on the stodge of rhubarb crumble and custard after our roast dinner almost every Sunday lunchtime. I’ve heard it’s very easy to grow, but living in a second-floor flat with no space to try, I was lucky that a rhubarb-growing friend of ours handed us a bunch. So I decided to make some jam and experiment with the addition of vanilla. It was lovely.


I remember popping into what was then our local veggie shop a few years ago and saying to the assistant there that I wanted to make some rhubarb jam. “Ooh, that will be nice,” she said, “but I bet it’d be a bit of a bugger to set.” I remembered her words, and chose proper ‘jam sugar’ with added pectin, just to help it along. I mean, I didn’t want to waste all that home-grown rhubarb, did I?

If you try the jam, you might find it quite sweet. This is how my husband likes it, while I like a bit of tartness to it – there’s no point hiding what the fruit actually is. So add a little less sugar if you’re like me and you enjoy rhubarb’s tartness.


Rhubarb and Vanilla Jam
Makes about 350ml

Ingredients:
  • 300g rhubarb, washed, trimmed and chopped into chunks
  • 275g jam sugar
  • half a vanilla pod

Method:
  1. Tip the rhubarb and the jam sugar into a sturdy, medium-sized saucepan and pour in a splash (about an espresso cup’s worth) of cold water. Heat gently, stirring occasionally, until the sugar has melted. Don’t boil at this stage.
  2. Scrape out the seeds from the vanilla pod half and add them to the pan, along with the pod half they came in.
  3. Bring to a rapid boil and drop in a sugar thermometer if you have one. If you don’t, stick a saucer in the freezer.
  4. Boil for about 15-20 minutes, stirring occasionally so it doesn’t stick and caramelise on the bottom. Your thermometer will tell you when to take the jam off the heat (at just over 120 degrees) or after 15 minutes drop a little bit on the frozen saucer. Leave for a couple of seconds and then push it with the spoon. If it wrinkles, it’s set. Take it off the heat. 

5. Fill sterilised, warmed jars with the mixture and seal. Great on toast, croissants or stirred into rice pudding.


What are your favourite rhubarb recipes?  


Monday, 9 July 2012

Cullen Skink

There’s something about the scent of smoked fish that is so calming and comforting. And of course when you combine that with soup, you have a match made in comfort food heaven.

Cullen skink is a creamy soup made with smoked haddock, leeks, potatoes and onions. Don’t let the name put you off – it’s named after the village it was first made (Cullen, in Morayshire) and an old word for ‘soup’ or ‘essence’. And if you love smoked fish but you’ve never tried it I urge you to give it a go.


Cullen Skink
  Serves 4, generously
  Ingredients:
 
  • 300g smoked haddock fillets, skin left on
  • 1 tbsp butter
  • a bay leaf
  • 1 onion
  • 1 medium-sized leek
  • 3 waxy potatoes (like the Charlotte variety, or new potatoes)
  • 250ml full fat milk
  • Black pepper
  • Chives, for serving
Method
  1. Lay the fish in a shallow frying pan and cover with 300ml cold water. Add the bay leaf and bring to the boil. Once the water has started boiling, turn off the heat and leave to cool.
  2. In a fairly large saucepan, fry the choped onion and chopped leek in the butter until soft but not coloured.
  3. Add the diced potatoes and give it a good grinding of black pepper. Stir.
  4. Pour in the haddock’s cooking liquid, along with the bay leaf.
  5. When the potato is cooked through, scoop out a couple of serving spoons of the chopped veg and leave on a saucer. This will add texture to your soup later on.
  6. Remove the skin and any bones from the fish and add about half of it to the pan, along with the milk. Remove the bay leaf.
  7. With a stick blender, blend the soup until smooth and creamy and then add the reserved vegetables and flake in the rest of the fish. Gently heat through, and give it a stir (try not to break the fish up too much though) and taste – add some salt if you need to but remember that the fish might aleady be salty. Serve while still hot, some crusty bread and the snipped chives sprinkled over the top.

Friday, 6 July 2012

Bubbleology Bubble Tea Launches in Notting Hill

 
Just thought I’d write a quick post to let you know about a new tea lounge that’s launching this month – its products have already proved popular in Soho and in Harvey Nichols. It’s a range of teas, that are either fruit or milk based, and have little balls of chewy tapioca balls dropped into the bottom of the cups. You suck up the tapioca from oversized straws while you sip on the tea, which can be served either cold or warm.
Among the flavours that will be launched at the Bubbleology Notting Hill café are: Rose Milk Tea with Rose Petal IcePassionfruit  and Cucumber, Coconut, Chocolate, White Peach, Pomegranate and Watermelon fruit tea. They cost £3.25 for a standard cup.  

Bubble teas are said to originate from Taiwan in the 1980s, and Bubbleology say that the drink now has quite a following over here in the UK too. They are made from a red, white or green tea base which are then infused with flavours from fruits. People who have tried the Bubble Teas say that the tapioca at the bottom of the cups has a chewy texture – a bit like gummy bears.

What do you think? Have you ever tried a Bubble tea? What was it like?

To find out more about Bubbleology visit http://www.bubbleology.co.uk/

Thursday, 5 July 2012

Tenderstem in Ten: Tenderstem and Blacksticks Silk Pasta Sauce

You may remember that I’m participating in the Tenderstem in Ten challenge from Tenderstem broccolli – creating meals using Tenderstem that you can have on the table in 10 minutes or less. Well, have I got a cracker for you.

Tenderstem broccoli with Blacksticks Silk pasta sauce. Go on, you would, wouldn’t you?

I’ve always been a fan of broccoli with cheese – and because with Tenderstem you can eat the stems and they cook in only three minutes – they’re perfect for adding to cheesy pasta sauces.

Because the whole point of the challenge is to create meals that cook in under 10 minutes, you’ll only get away with this if you either use a thin, small, dainty dried pasta that cooks really quickly (no chunky penne or tagliatelle here) or just buy fresh pasta shapes from the supermarket fridge. They cook in just about 3 minutes too, so you could be sitting down to eat within 10 minutes of moving, to be honest.

I chose Blacksticks Silk cheese, which is a semi-hard goat’s cheese and has a fresh, fairly mild flavour – not as rich and spicy as some blue cheeses – which works so well with the creme fraiche and the garlic. I loved this, and even though I made this just for myself one rainy lunchtime I would make more next time and feed it to the whole family. The cheese doesn’t dominate, leaving that to the green, tender broccoli. Try it – I hope you like it. 

Tenderstem Broccoli and Blacksticks Silk Pasta
Serves 1, generously

Ingredients:
  • 5 spears of Tenderstem broccoli
  • 80g fresh pasta shapes 
  • 1 clove garlic, chopped finely
  • olive oil
  • 20g Blacksticks Silk goat’s cheese
  • 2 big, heaped tablespoons creme fraiche
  • black pepper
  • Parmesan, for sprinkling
Method:
  1. Boil the kettle and pour the hot water into a fairly large saucepan on a medium-high heat. Wash and cut the Tenderstem broccoli in half just under the florets.
  2. Add a pinch of salt to the pan and tip the pasta shapes and the broccoli into the water to cook. Keep an eye on them – they’ll just take a few minutes.
  3. Meanwhile, fry the chopped garlic clove in a drizzle of olive oil until soft. Stir in the creme fraiche and grind in some black pepper to season. Once the sauce is bubbling, turn off the heat and crumble in the cheese, stirring to mix.
  4. When the pasta is tender, drain it and add to the sauce, trickling in some of the cooking water if you think the sauce needs thinning out a little.
  5. Tip into bowls and serve, with a block of Parmesan for grating over.
Blacksticks Silk Goat’s Cheese

Wednesday, 4 July 2012

Chorizo, Chickpea and Sweet Potato Stew

I’ve found my new favourite ingredient: Riverford Organic’s chorizo. It has a softer texture than the chorizo I normally buy; a bit more like a coarse butcher’s sausage rather than dry, chewy links, and I love it. The recipe was developed by Ben Watson in their Farm Shop and before they sent it to me they assured me that it was good – and it really is.

I had a tin of chickpeas in the cupboard so had my eye on a kind of Spanish stew – and I remembered the Stewed kiosk often having a chickpea and chorizo stew of some sort on their menu so I gave this a shot. As well as being colourful it was full of flavour – from the smoky chorizo to the creamy chickpeas, all freshened up with some chopped parsley. I topped mine with pieces of goat’s cheese, but you don’t have to – it just adds a creamy sourness in the same way that sour cream does for a chilli con carne for example – and you couldn’t go wrong with a good, orange-yolked poached egg on top, either.


Chorizo, Chickpea and Sweet Potato Stew
Serves 4-6

Ingredients:
  •   3 Riverford Organic chorizo sausages
  • 1 tablespoon olive oil
  • 4 chunky cloves of garlic
  • 1 red onion, chopped
  • 1 400g can chickpeas
  • 1 400g tin chopped tomatoes
  • 1 large sweet potato, peeled and diced into 1 cm chunks
  • small handful flat leaf parsley, chopped
Method
  1. Drizzle the olive oil into a large frying pan and put on a medium heat. De-skin the chorizo and cut each into 4 pieces. Fry for a few minutes – until the oil has turned amber and the sausages are browned.
  2. Throw in the chopped garlic and onion, reduce the heat and cook for 2-3 minutes, until soft. Tip in the tomatoes, chickpeas and sweet potato. Refill the empty tomato can with water and add to the pan. Give it a good stir.
  3. Cook gently, uncovered for about 40 minutes, until the sweet potato is soft. You might need to add a little more water if it turns dry and slightly jammy.
  4. Just before serving, scatter over the chopped parsley and serve with couscous or boiled long grain rice.


What are your favourite chorizo dishes?

LinkWithin

Related Posts Plugin for WordPress, Blogger...