Friday, 30 March 2012

Book Review: Simple French Cooking for English Homes by Xavier Marcel Boulestin

Here at Comfort Bites, we’ve covered Italian food, Asian food, American food, British food and even the comfort food of the southern Caribbean. But we haven’t really covered French cooking very much. Which is why I was excited to have the opportunity to review a real classic when it comes to French cookery: Simple French Cooking for English Homes by Xavier Marcel Boulestin.


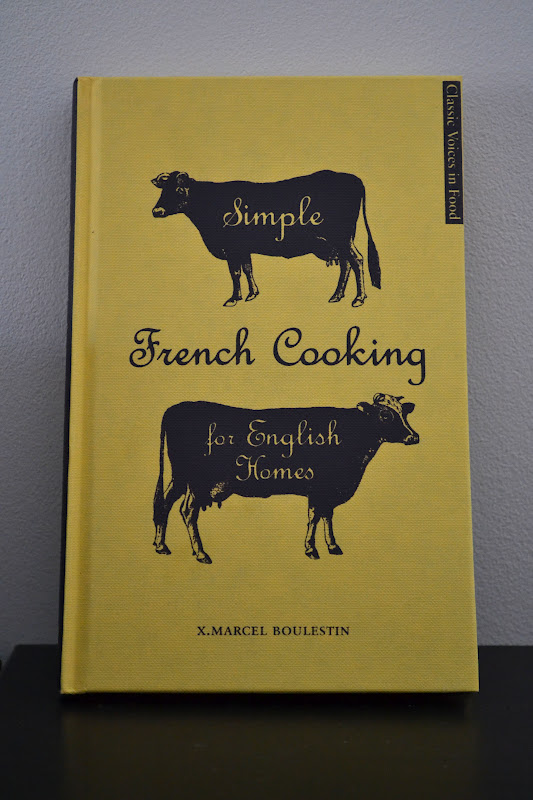
Xavier Marcel Boulestin moved from Paris to London in 1906 and was a major influence on Elizabeth David. In 1937 he appeared on television; giving him the title of the first TV chef. Simple French Cooking for English Homes was first published in 1923 and has now been republished as part of Quadrille’s Classic Voices in Food collection. When it was first published it was a huge success and helped simplify some of the French dishes that had become fashionable in Britain at that time.

And the book really does ooze simplicity. More a set of recipe suggestions rather than actual measured-out recipes, you can read through and make authentic French dishes easily. The author’s tone is authoritative, and sometimes a bit controlling: “to make a good omelette is not as easy as it seems… you must not use the frying pan for anything else; you must never wash it… and keep it greasy if you are not going to use it for some time.” But in a way, that’s what you need. A no-fuss voice in the background instructing you how to make a proper omelette or a good Béarnaise sauce.
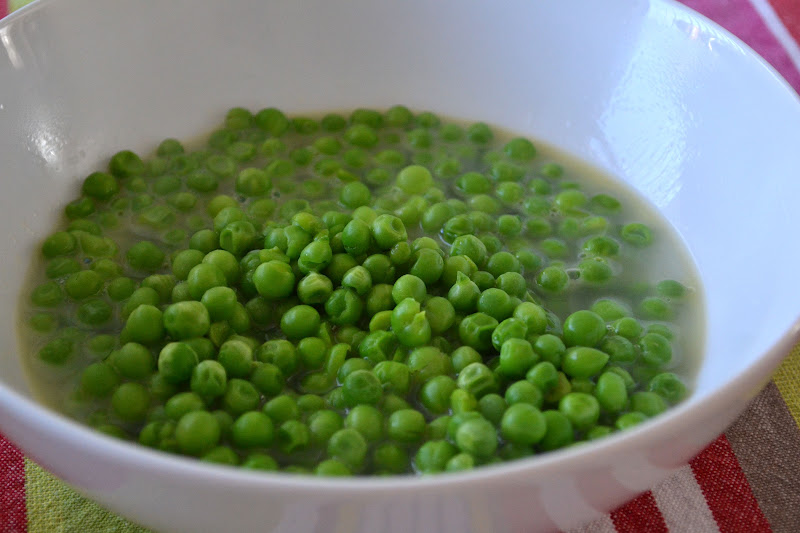
Petits Pois


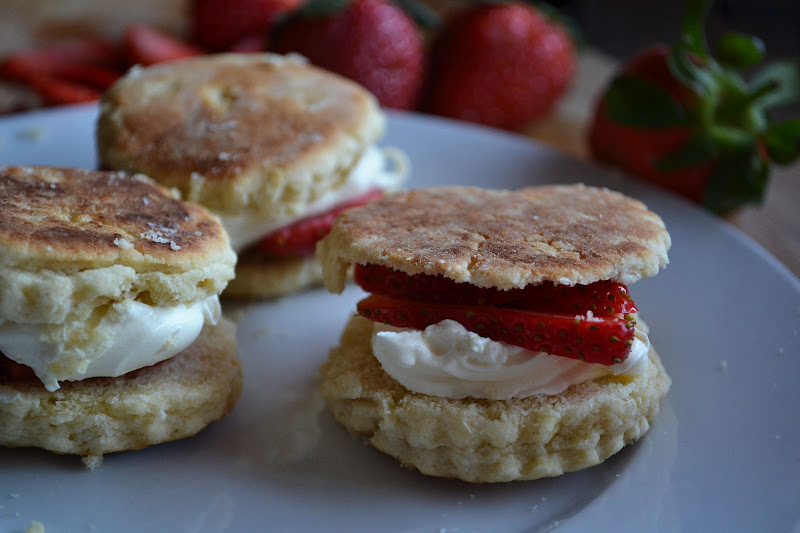
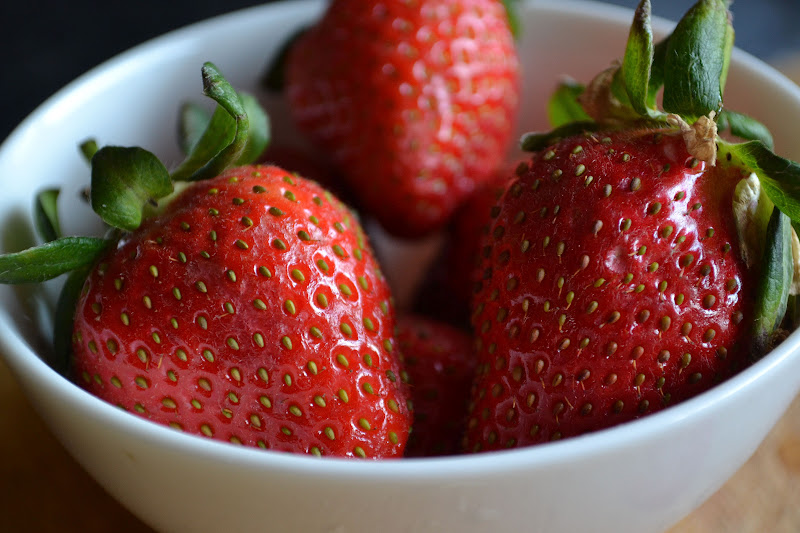
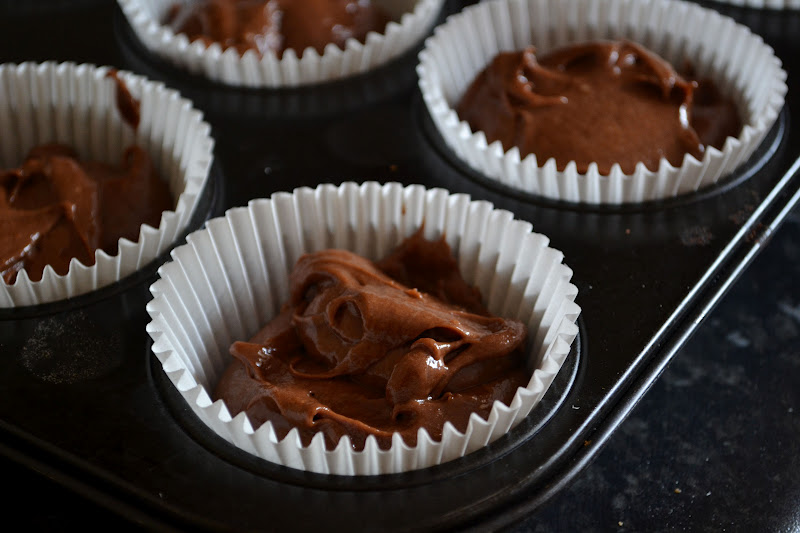
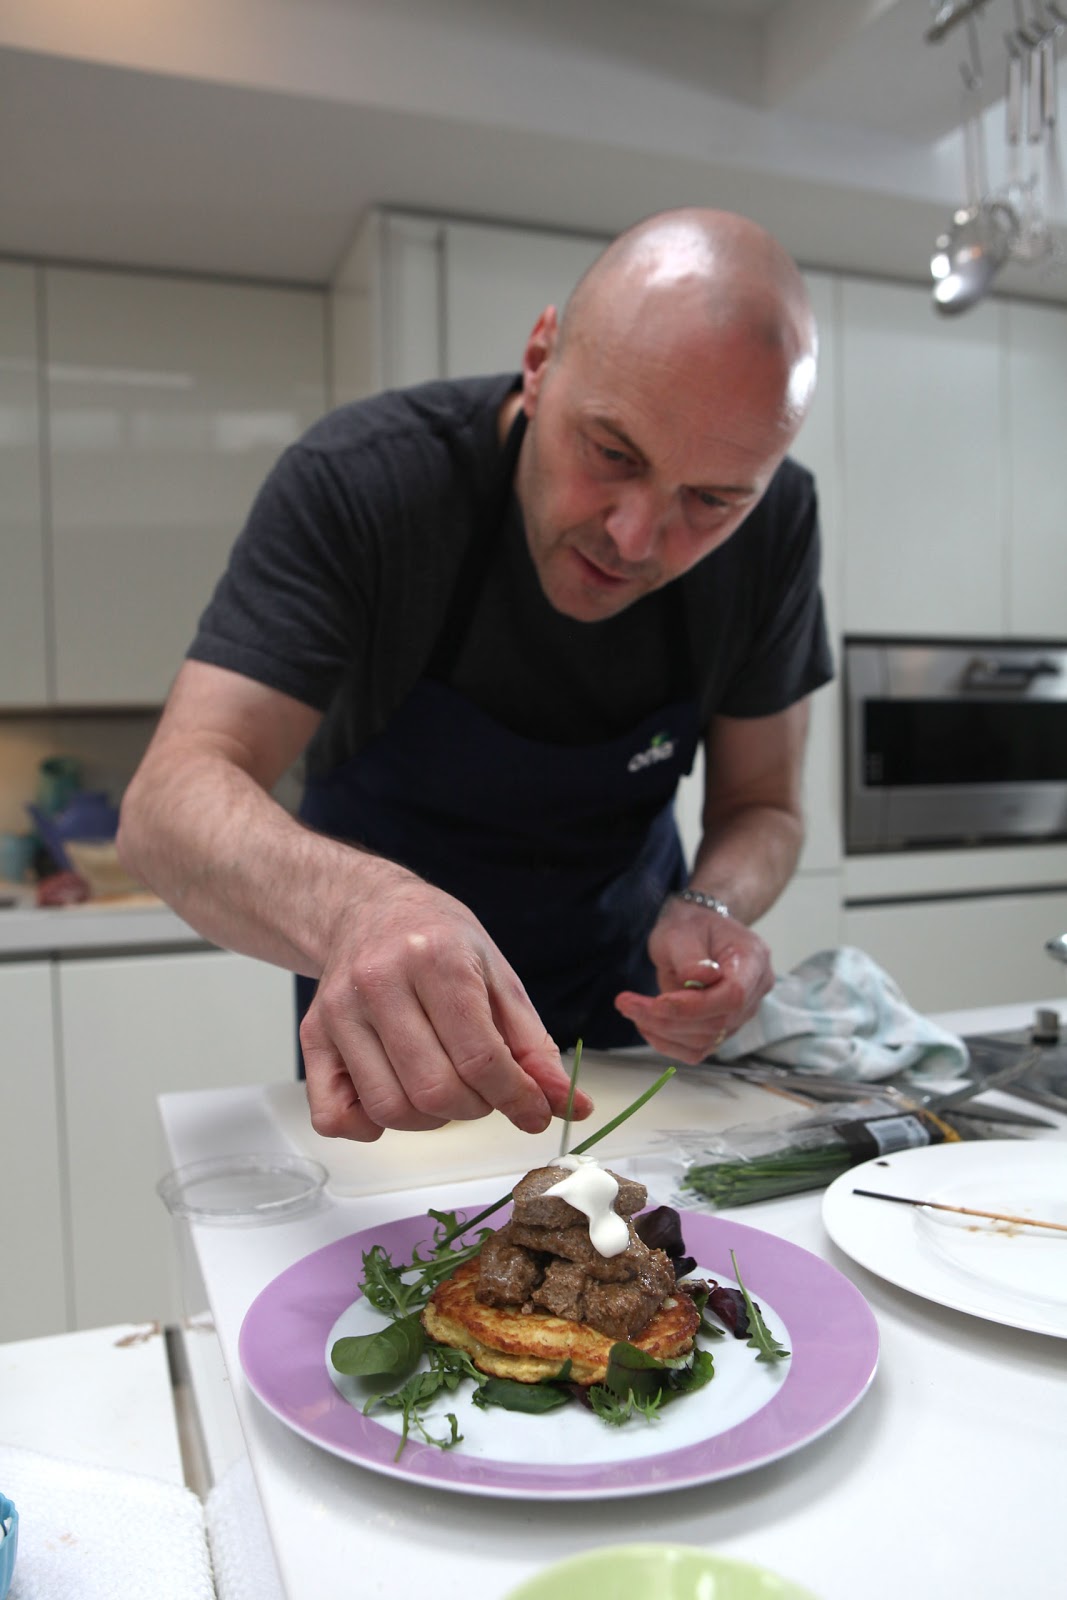
The food is amazingly simple, so much that you read through each recipe a couple of times to make sure you haven’t missed anything. But it tastes incredible. The strawberries sprinkled with sugar and claret (Fraises au Bordeaux) was the best little bowl of fruit I’ve ever eaten and after having had the Petits Pois (cooked with onion, lettuce, water and butter) I don’t want to cook peas in any other way again. The book contains no photographs, a fact that shouldn’t detract from the book as it is written in such an easy to read tone. As well as the simpler dishes there are also more elaborate recipes involving ingredients such as foie gras, patridge and seafood. But there is a whole section on vegetables, another on eggs and another for desserts and pastry so there will be something that everyone can learn from the book, regardless of their diet.
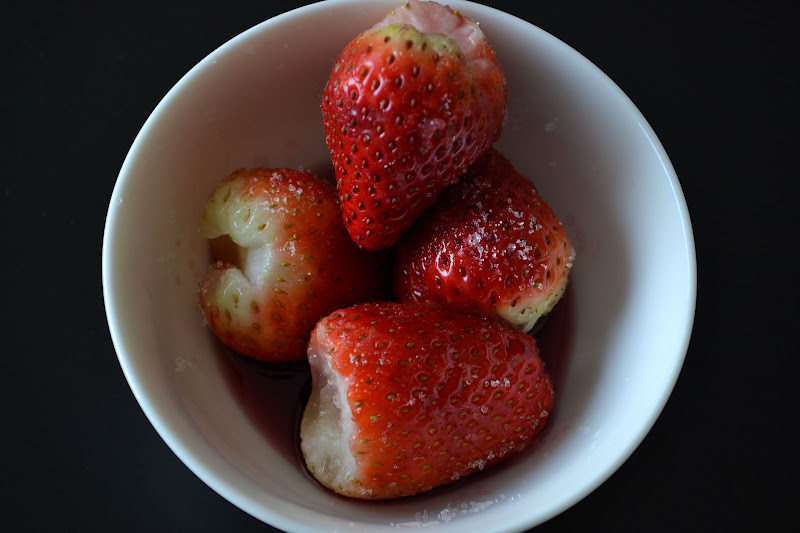
Fraises au Bordeaux


The book is a great collection of authentic French recipes. But as well as this, it’s also a glimpse into the past; into the dishes that were fashionable in the 1920s and which foods the British wanted to eat. I loved reading the advice at the beginning of the book. Gems such as “a good cook is not necessarily a good woman with an even temper. Some allowance should be made for the artistic temperament” and also “do not let your servants look after the wines. Do it yourself.”  

Simple French Cooking for English Homes by Xavier Marcel Boulestin is published by Quadrille.

Thursday, 29 March 2012

We Decorate Chocolate Eggs with Asda’s Egg Decorating Set

With Easter fast approaching, I was asked if we would like to have a go at decorating a chocolate egg from Asda’s egg decorating kit. The kit comes with a tube of white icing that tastes like vanilla and some colourful white chocolate buttons.


I was anticipating a bit of mess, but thankfully, the girls found them really easy to use. Wiggly lines etched onto the eggs gave them a guide for where to put the icing and they decorated them in the plastic tray they came in, which made everything a lot easier. 

My 6 year old decided to make a pretty pattern with hers with dots and wiggles and some precisely placed chocolate buttons…


While my 3 year old opted for making a face with her egg…


… I think more of the chocolate buttons got eaten than ended up stuck on the actual egg though…


They loved doing it, and if I hadn’t been taking the photos I could have easily left them to it and had a few minutes with a book and a cuppa while they iced and chomped on the spare chocolate buttons.


The best thing about it though for them, was that decorating their own egg felt special – it was great to see the concentration on their faces and they really did enjoy doing it. It would be a good idea to get a few of these if you have kids over during Easter – just leave them to get on with it!

Look out for the decorating kit in Asda stores in the run up to Easter.


Tuesday, 27 March 2012

Fashion Meets Food: The Dress Made from Crisp Packets

Love crisps? Love them enough to make a dress out of the empty packets? Of course you do. And students from the Plymouth College of Art have done just that. The four students, who are studying for a BTEC Extended Diploma in Fashion and Textiles made the dress from recycled Burts crisp packets.


The dress was entered into the Cheltenham Festival’s Best Dressed Lady competition this year. What do we think, guys? Would you wear it?

Monday, 26 March 2012

Guest Post: Fuss Free Food for Family Car Journeys

I recently applied to join the Sainsbury’s Finance Family Blogger Network, but while I’m waiting to hear whether or not I’ve been successful (fingers crossed!) they’ve offered this guest post with tips for feeding children on family car journeys. I thought this was particularly relevant seeing as the Easter holidays are coming up. I hope you enjoy it and find it useful!


Fuss-free food for family car journeys
 
  
Ensuring that children have enough food to keep them happy on car journeys can be the crucial difference between having a successful or a stressful trip.
 
Picnic breaks are ideal, as they provide a great opportunity for children to run about and let off steam. But what if it’s a rainy day, or you don’t have enough time to stop and relax?
 
Sometimes eating in the car is the only option, and here it can pay to plan ahead. These are some healthy, fuss-free ideas for what food to pack for your journey and produce at the first sign of hunger pangs.
 
Bored or hungry?
 
Children sometimes say they are hungry when they are bored – and bored children can be a driver’s worst enemy. You can keep them busy – and quiet – by providing the sort of snacks that are easily opened without any adult help. Dried fruit in a carton, say, or a squeezy yoghurt.
 
Less mess
 
A crumb-free car at journey’s end may seem like an impossible dream, but there are ways of making your journey less messy.
 
  • Dry foods, such as mini cereal snacks in individual plastic pots, wrapped crackers, or oatcakes will not end up as a smeary mess on the seats.
  • Instead of sandwiches, you might find that a pitta pocket or a wrap is a better bet than bread, to prevent sandwich ‘fall-out’.
What to avoid
 
Anyone who has ever collected children from a party knows what happens when they’ve had too many sweets and fizzy drinks. The last thing you want in the back of the car on a long journey is the noisy over-excitement that can follow a sugar rush. A good way of avoiding this is to provide healthy foods designed to provide a slow release of energy.
 
The healthy option
 
Most people will want to make sure that the food their children eat on car journeys forms part of their normal healthy diet. It’s easy to pack food that is both portable and nutritious.
 
  • They’ll get some of their five a day if you prepare sticks of vegetables such as carrot, celery or cucumber and keep them fresh in little plastic pots.
  • Fruit can be messy, but grapes – preferably seedless – are a good stand-by. Most children also love bananas, once they are old enough to peel them.
  • Add some protein, perhaps by cutting some batons of cheese and putting them in a plastic container, or taking sliced meat.

Planning ahead
 
Because you don’t know what hold-ups will lie ahead, it’s a good idea to pack a little more food than you think you might need for your journey. Extra supplies could help keep children happy and occupied in the event of a traffic jam or breakdown.
 
Planning ahead in this way and making sure you have enough to feed your family will help take the stress out of your journey. Knowing that you have adequate car insurance cover can also set your mind at ease.
 
 
Author Bio:
Janet Chapman is a freelance writer on a range of topics including lifestyle and family matters. Her interests include cooking, the countryside and trying to train her Rhodesian Ridgeback dog.

This post was provided by Sainsburys Finance and is provided for information. It is not a sponsored post.


Friday, 23 March 2012

Figs with Goat’s Cheese and Honey

 
The new love of my life….. how did I miss these for so long?


They’re figs. Ripe, scented and ruby inside, scattered with soft goat’s cheese and drizzled with honey. It’s my new guilty pleasure. But the figs have to be ripe: if in doubt, give them a gentle squeeze. They should be soft to the touch.


I don’t know if there is an elegant or lady-like way to eat these – you really just have to get stuck in. You can scrape the soft flesh inside with a teaspoon, or just nibble at the quartered figs with your fingers. In any case, the creamy white cheese balances against the sweet honey and the scented, juicy figs just bring everything together. I love this. *sighs*
These are great as a snack or a grown-up dessert.


Do you like figs? What’s your favourite way to eat them? 


Wednesday, 21 March 2012

Animal Print Cupcakes


Now, I’m not really very artistic, but these are actually really easy to make and they’re great for a party or just something fun for the kids. All you need is a batch of cooled cupcakes, some ready-to-roll icing, a jar of jam and some cake decorating pens. I got mine online from Cakes, Cookies and Crafts. I think I could make these better next time, with a bit more practice and a steadier hand. Here’s how I did it….


First, make a batch of your favourite cupcakes, and leave to cool. These are vanilla.


Using a spoon, spread a little jam over the top of the cupcake to help the icing to stick.


Dust a work surface with a little icing sugar and roll out the ready-to-roll white icing to about 3-4mm thick.


 Cut circles out of the icing, just big enough to fit over the top of your cupcakes and carefully place them over the jammy cakes. Rub them with a fingertip once placed, which will help smooth out any tiny cracks in the icing.


Carefully start to draw your design on top of the cake with a cake decorating pen. These are just like a felt tip, only they have food colouring inside – be careful not to drag the icing – use light, stubby little strokes. It also helps to have a pattern to copy if, like me, you’re not very artistic. Check out Google. These are the beginnings of leopard print cakes…


…or make zebra striped cakes – these were copied from a picture of an actual zebra (yeah, I know, get me). 


What do you think? Funky or what?

Monday, 19 March 2012

Random Recipe Challenge: Jamie Oliver’s Welsh Cakes from Jamie’s Great Britain

One of the good things about this month’s Random Recipe Challenge from Dom at Belleau Kitchen, was that it forced me to count my cookbooks. The idea was to get to 17 and then stop, but then I realised that I didn’t actually know how many I had. And now I do: 39. And, as I ran my finger along the bookcase, the 17th cookbook I came to was Jamie’s Great Britain.


And the recipe – chosen at random from a semi-closed flick of the pages – was Wonderful Welsh Cakes on page 192. Nice.

These were really simple to make, helped by the fact that you only need a few storecupboard ingredients such as flour, caster sugar, butter and egg. Jamie scatters some dried fruit through his dough, but knowing my children would spend ages picking them out before eating, I chose to leave that bit out and save them the bother. I split the cakes when cool and filled them with whipped cream, sweetened with a little sugar – and some sliced fresh strawberries. They looked amazing, and a bit posh, too.


To look at, they’re a lot like flattened scones, but they have a soft, shortbread-like texture to them; not as doughy as a scone. And you cook them for 4 minutes on each side in a large, dry frying pan so they’re super quick to make, too.


I loved them, and the girls took a couple to school the next day in their packed lunches. These would be great for a little tea party or a street party for the Queen’s Jubilee in the summer and I will be making them again. I’ll maybe even have a play with some different flavours next time. Watch this space….


Friday, 16 March 2012

Black Pudding and Cabbage Potato Cakes with Fried Egg

Although the recipe for this gorgeous treat is mine, the idea isn’t. It’s inspired by The Flavour Thesaurus by Niki Segnit, who suggests combining leeks, potato, mustard powder and black pudding in little flour-dusted patties. But going on what I had left over in my fridge, I decided to make these: soft mashed potato, dark green cabbage and velvety black pudding work so well together…

This is also a great way to use up any leftover mashed potato (according to research, potatoes are one of the most thrown-away foods in the UK). Black pudding is cheap too – and these are so simple to make. You could make them up the day before and keep them in the fridge to cook for breakfast – or eat for lunch. For its size, it’s surprisingly filling.

Oh, and in case you’re wondering about the egg – the rich, orange colour comes from my favourite – the mighty Clarence Court Cotswold Legbar variety. Yum!


Black Pudding and Cabbage Potato Cakes with Fried Egg
Makes 6-7 large cakes – save any leftover in the fridge and have the next day, like I do!

Ingredients:
  • 1kg all-purpose potatoes (for mashing)
  • half a small, green cabbage (thick white core removed from each leaf)
  • 450g good quality black pudding
  • Flour, for dusting
  • Salt and pepper
  • 1 egg, per person
  • Olive oil, for frying
Method:
  1. Peel and cut the potatoes into large chunks and boil in slightly salted water until tender. Take off the heat, but don’t drain them yet.
  2. Chop the cabbage leaves into small pieces and add to the potatoes. The leaves will wilt slightly in the residual heat. Leave for 2 minutes and then drain.
  3. Mash the potatoes with the cabbage pieces (I don’t use butter or milk for this, just leave them plain). Leave to cool.
  4. Crumble up the black pudding into fairly large chunks and mix with the cooled mashed potato. Check for seasoning and add salt and pepper if you think you need to. 
  5. Preheat your oven to 200C.
  6. Using your hands, scoop up handfuls of the mixture and form into large patties – coat with the flour and form into a fishcake-shape.
  7. Heat the olive oil in a frying pan and fry the black pudding cakes until browned on both sides, about 4-5 minutes on each side.
  8. Slide onto a baking tray and cook in the oven for about 25-30 minutes, until completely heated through.
  9. Serve hot and sizzling, with a fried egg on top.
Do you have any favourite ways to eat black pudding?


Wednesday, 14 March 2012

Bloggers Scream for Ice Cream Challenge: Coke Float and a Science Lesson

I’m not very good at making ice cream. I don’t have an ice cream maker and when I make it in a tub in the freezer it usually goes all grainy or too hard and brittle and loses its creaminess. So when Kavey announced that the March Bloggers Scream for Ice Cream challenge was to recreate an ice cream-themed memory or experience from our childhood, I was thrilled. And to be honest, there was only one contender: The Coke Float.


I was born in the late 1970s and my fondest childhood memories are from growing up near Southampton in the mid-1980s. I used to sing True Blue with my friends in the playground at school, wear chiffon scarves in my hair and lace fingerless gloves with cut off jeans at the weekends. And I remember going out with my sister for the entire day during school holidays and weekends: from about 8.30 in the morning, returning home at about 5pm for dinner. And if we turned up any earlier at our doorstep, with muddy knees and thirsty from bike riding, we’d be lucky if we got one of these to drink on the porch.


I don’t know how it started. I think my sister had been given a Coke float by a friend’s Mum and then she asked ours to make it one day for us. You just pour Coke into a long glass, and top with a scoop of vanilla ice cream. You can use lemonade or cream soda instead, if you prefer. Just leave a bit of room at the top of the glass, because it fizzes and spews out these creamy bubbles. The bubbles themselves are fizzy, which makes it fun to eat. And if you push the ice cream down into the glass, it will froth and fizz and probably spill all over the worktop. So eat it gently, with a spoon and then drink what’s left in the glass.

And if you’re wondering about why it turns frothy, I asked food science blogger Alex from the Procrastibaking blog to explain. “So, ice cream, if made properly, is based on milk and eggs.” He continued: “Those two ingredients are filled with proteins which are whisked, churned and frozen. This allows the formation of a stabilised protein structure with pockets of air from the churning (so ice cream isn’t just a solid block of…well…cream). It’s sort of like an amalgamation of lots of layered nets.”

The ice cream is colder than the cola, the cola is carbonated and it also contains Aspartame. “When you drop your ice cream into the glass of cola, the ice cream begins to melt, forming a layer atop the cola. The net like structure of the protein is still present and it waits to capture anything that tries to cross it. The addition of the ice cream causes a set of complicated reactions that lead to the carbon dioxide being released and travelling upwards, they get caught in the layer of melted ice cream. This entrapment is what is seen as foam: CO2 gas trapped in a protein structure.
 The aspartame acts as a surfactant, which decreases the surface tension of the bubbles in the cola’s surface, leading to more bubbles trapped in the foamy net. This is why certain drinks produce more foam – they have more ingredients which act as surfactants.”

Got that? 

Enjoy!


Do you have any childhood ice cream memories? 

Monday, 12 March 2012

Carte Noire Instinct – Wholebean Instant Coffee

A few months ago, there was a lot of hype surrounding one particular brand of coffee: Kenco Millicano. It was touted as an instant coffee with all the taste of filter coffee and ads started to appear on TV showing a Mum walking to school in a dressing gown to reclaim her sacred tub of the stuff from the harvest festival table. Well, eventually I gave in and tried it. I found it, in all honesty, to be no better than the usual instant coffee we buy and gave it to someone else to try.


And then, more recently, I was contacted by Carte Noire, who asked if I would like to try their new instant coffee. Wondering, after my Millicano experience, if an instant coffee could ever really compare with the proper stuff, I agreed. And I really liked it. What Carte Noire have done is add 15% finely milled roasted coffee beans to their instant coffee, so you get a much darker, richer cup than the usual instant coffee. The rich flavours build as you drink, too – so the flavour develops all the way through your cuppa. Even the best instant coffees I’ve had up until now don’t do that.

Carte Noire Instinct was launched in February this year, and this is the first major product launch it’s had since the brand came to the UK in 1996. Carte Noire call it “a deliciously silky and deeply aromatic cup of coffee that will seduce your palate with every sip”. But is it as good as filter coffee? Personally, I don’t think it tastes exactly the same, but then it doesn’t claim to. And the flavour is rich and smooth, so does come very close. I liked it, and would buy it again.

For more information check out the Carte Noire Instinct Facebook Page or look out for it in your local supermarket.

What do you think? Have you tried wholebean instant coffees? Can an instant coffee ever really live up to filter coffee?


Saturday, 10 March 2012

Competition! Win an Asda Extra Special Hamper with Products Approved By Leiths

Chefs at London cookery school Leiths have teamed up with Asda to approve their 'Extra Special' range of ingredients, available in the shops now. As you would expect, they focus on quality, and are really handy to have around the kitchen. I used the mini meringues to make my Oreo meringue dessert – they were just the right size and helped me cut down on time because I didn't have to make and cool them myself. The giant shell-shaped conchiglioni I stuffed with a meaty bolognese sauce, scattered with cheese and baked in the oven (that deserves a post of its own, more on that later). And the chocolate and stem ginger biscuits were amazing – just the right amount of gingery spice with little jewel-like pieces of ginger and then dipped in plain chocolate. Lovely with a cuppa.
And one lucky Comfort Bites reader can win a hamper packed full of these Extra Special goodies. The hamper includes: 

Extra Special all butter pastry cases
Extra Special artisan flat breads
Extra Special plain chocolate
Extra Special mini meringues
Extra Special strawberry conserve
Extra Special Spanish orange blossom honey
Extra Special Italian pesto alla Genovese
Extra Special Aceto Balsamico di Modena
Extra Special all Butter parmesan and garlic mini twists
Extra Special garlic dipping oil
Extra Special apricot crumbles
Extra Special Italian conchiglioni
Extra Special spiced plum and ginger marinade
Extra Special stem ginger chocolate biscuits
Extra Special Belgian milk chocolate and pecan popcorn clusters
Extra Special black pepper ciabatta croutons
Extra Special Semillon Sauvignon Blanc
Extra Special Chianti Classico Reserva

I'm not one for great big lists on giveaways asking you to link here and Tweet there, so I've kept it simple. First, leave a comment below (click on the Rafflecopter widget to register your entry) saying what you would make with any of the items in the hamper listed above, or any of the products listed on the Asda Extra Special website. Then, come over and join me on Twitter @joromerofood (say hello!) and/or on Facebook for bonus entries.

The rules:
     
  1. The winner will be chosen by random via Rafflecopter on 5th April 2012, and entries will be verified. Entrants must be over 18 years of age.
     
  2.  
  3. The hamper will be sent by Asda, and can only be delivered to a UK mainland address.
     
  4.  
  5. If any item in the hamper is unavailable at the time of sending, Asda reserve the right to replace it for one of similar value.
     
  6.  
  7. The winner will be contacted via email, Facebook message or Twitter by April 7th 2012. If for any reason the winner can't be contacted within 7 days, another winner will be chosen.
     
  8.  
Ready? Then enter now for your chance to win! Click on the Rafflecopter icon to start (click 'read more' below) and register your entry!

Friday, 9 March 2012

Chocolate and Avocado Cupcakes – We Should Cocoa

When it was announced that the new We Should Cocoa challenge would need to include chocolate and something green, I was actually really pleased, because on exactly the same day, I had seen Lily Vanilli’s Chocolate and Avocado cupcake recipe on the internet and bookmarked it. Spooky, huh?


So there was no difficulty in choosing what to make for this month’s challenge. What there was difficulty with, however, was finding a ‘very ripe avocado’ as the ingredients list states. I got funny looks gently squeezing all the avocadoes at the supermarket, and eventually settled on the two that were the squishiest and left them on the kitchen worktop for a week or so to finish ripening. And did they ripen? No they did not. They just sat there, in a state of self-preservation, refusing to turn to that soft, buttery texture I needed. So I just got on with it and made the cupcakes anyway.


You make up a chocolate cupcake mixture which is easy enough, pour into cases and then cook in the oven. When they’re cool, you mix up mashed avocadoes, lemon juice and icing sugar until (ahem) smooth and spoon on top of the cakes. Obviously because my avocadoes were soft, but not really, really ripe, I still ended up with little lumpy bits which I couldn’t beat out. But it really didn’t matter.

The green avocado icing was creamy and sweet – and tasted a little bit lemony, but although it didn’t taste of avocado as such, it definitely tasted ‘green’. And all that citrussy, ‘green’ flavour on top of a moist, dark chocolate cupcake was gorgeous. The walnut on top just gave it a touch of earthiness that brought all the sweetness together. I know this sounds weird, but it’s so difficult to describe, I’m just going to have to try and convince you to go and make it yourself.


The fact that avocado goes brown if you leave it out too long gave me a worry though. You don’t want these going a dirty pale brown if you’ve made them for a party or to give as a present. So I conducted a little experiment. I left a couple of the iced cakes out on the kitchen worktop and kept checking them throughout the morning for colour. I found that they lasted a good 3-4 hours at least. So if you’re making these, just make them as soon as possible before serving, and then you’ll get the longest life out of them. Not that they’ll probably last that long – they’re so amazing and different that people will soon be gobbling them up.

I loved them, and this definitely won’t be the last time I use chocolate and avocado together in a recipe. Now. Chocolate, bacon and avocado toastie, anyone? (That actually sounds quite nice!)


Edited to Add: Actually, after I published this post, I’ve been checking on the cupcakes and they’ve been on the worktop now for 7 hours – and the icing is still green. So don’t let that put you off making them – they’ll last ages!


Thursday, 8 March 2012

Coronation Chicken Tartlets, or Voluvents, If You Will

To mark the Queen’s Diamond Jubilee in June this year, I wanted to make something that could be whisked out to street parties and that was also fairly traditional. I love Coronation Chicken, which was invented to mark the Queen’s coronation in 1952, so it seemed perfect.

What I thought I was making was puff pastry tartlets, but what they turned out to be is stubby little voluvents. I remember at every wedding/christening/Christmas party in the 1980s there were always loads of them, all lined up with mushroom, prawn cocktail and cheesy fillings. And I’ve kind of missed them.

The coronation chicken sauce is quite fruity, on account of the mango chutney in there, and I’ve made them taste lighter by using natural yoghurt as well as mayonnaise. They’re also a great way for using up leftover roast chicken.


If you tried, you could get them down in one bite. But that wouldn’t be very elegant for a garden party or street party in the summer. Down them in two and swiftly move on to the next, that’s what I would do. I hope you enjoy.

Coronation Chicken Voluvents
Makes 12-14

Ingredients
  • 1 x 500g block of puff pastry
  • plain flour, for dusting
  • About 350g cooked, roast chicken, cooled
  • 1 tbsp garam masala
  • 2 tbsp mango chutney
  • 1 tbsp mayonnaise (I used Hellman’s)
  • 2 tbsp natural yoghurt
  • pinch salt
  • 1 egg, beaten
  • coriander leaves, to garnish
Method
  1. Preheat the oven to 220C. Dust a work surface with flour and roll out the puff pastry to about half a centimetre thick. Using a circular cutter, stamp out rounds from the pastry in quick, decisive movements. Try not to twist the cutter into the pastry, or your cases might rise a bit wonky. I used a 6cm serrated cutter that I usually use for scones. Re-roll any scraps of pastry until it’s all used up.
  2. In a bowl, mix together the garam masala, mango chutney, mayonnaise, natural yoghurt and salt and chop the chicken into small chunks. Mix the sauce and chicken together until the chicken is lightly coated.
  3. Line a baking sheet with greaseproof paper and gently place your pastry circles on it, leaving a little gap between each to allow for rising. With a sharp knife, score a circle just inside the pastry, to mark the cavity for the filling. It helps if you do this in two semi-circular shapes rather than try and score the circle as you would draw it. Brush with the beaten egg and bake in the oven until risen and golden – about 15 minutes. Take out and leave to cool.
  4. When the pastry cases have cooled, gently push the end of a spoon handle into the centre of the pastry case to form the hole for the filling. Press gently around the sides of the border you made to make a nice, neat case.
  5. Fill the case with the chicken mixture, choosing the smaller chunks first. Top with a coriander leaf or two and serve.


Tuesday, 6 March 2012

Oreo Recipes


Last weekend I spent pretty much the whole time in the kitchen playing around with Oreo cookies and coming up with recipes for Yahoo! Lifestyle. The best bit about it was I got to try them all out, of course! My favourite? The Oreo and Lemon Truffles although the Grown Up Milkshake comes a pretty close second. And actually the meringues were tasty, too. Oh, never mind….

Take a look at them on the Yahoo! Lifestyle website.


What do you think? Do you like Oreos? What are your favourite Oreo recipes?

Monday, 5 March 2012

One Blogger Event and Simon Rimmer’s Chorizo Scotch Eggs with Pepper Chutney

Recently, I was asked if I wanted to attend a cooking event with Simon Rimmer, to promote the One brand of products. Unfortunately (as is so often at the moment) I had family commitments and couldn’t go along. But the lovely people at One did send me a goodie bag of products and recipes from the day, to cheer me up.


The One brand includes products such as bread, eggs, porridge, water and handwash – all every day, basic items. What’s special about the brand is that these items are sold at the big supermarkets, but they help fund humanitarian aid projects across rural communities in Africa. So you’re buying them for a really worthwhile cause.


Simon Rimmer had devised a number of recipes especially for the One Brand and I was sent copies of them to try out at home. There were recipes for Chorizo Scotch Eggs with Pepper Chutney, Earl Grey Tea Bread and Butter Pudd with Toffee Sauce, and Lamb Tikka with Curried Cauliflower Pancakes. With a love of chorizo and scotch eggs and a pack of 6 One eggs to get me started, I opted, naturally, for the Chorizo Scotch Eggs.

I whizzed up the white loaf I’d been sent to make breadcrumbs for the coating, which is also mixed with polenta to add a dusty crunch.


The scotch eggs were really tasty, and simple to make; there was just a little bit of scary deep-frying but that was only for 4 minutes. The red pepper chutney is sweet, and has just a little hum from the chilli that goes into it, too. The scotch eggs probably took about 20 minutes from start to finish and the chutney took about 15 minutes – an amazing dish for such a quick recipe. The scotch eggs and chutney worked so well together, I’ve already been asked to make it again. The leftover scotch egg was quickly turned into a gorgeous sandwich with the leftover chutney for lunch the next day too – lovely!

The recipes are up on the One website if you want to have a go at them yourself. And do check out the One Brand next time you’re doing your shopping. For more details, the One Brand can be followed on Twitter @onedifference or on Facebook at www.facebook.com/onedifference .


Friday, 2 March 2012

Chablis Tasting and a Very Tasty Asparagus, Brie and Prosciutto Tart

Yes, you read that right. This week I have been mostly learning about wines; Chablis, to be exact. And while I’m nowhere near being a wine ‘buff’ I’d like to think that, thanks to the lovely people at Chablis, I’ve picked up a few tips and hints on how to taste and serve wine in the future.


For example. Did you know that you can tell whether a wine is sweet or dry just by watching the speed the droplets fall down the glass when you swirl it? (Dry wine droplets fall faster). And did you know that the darker a wine is, the older it is? I didn’t. I also learned how to taste a wine properly by smelling it first and then tasting it to get the full flavours that are there. Honestly, I’ve been going on about ‘fruity aromas’ and levels of acidity this week, but it’s all been pretty exciting.

The idea was for me to be sent a couple of bottles of wine and pair them up with the foods I think they would go the best with. The wines I was sent were Chablis Premier Cru, Les Vaillons, 2007, Billaud-Simon and Chablis, Les Champs Blancs, 2010, Pascal Bouchard.


The first one I tried, the Chablis, Les Champs Blancs, I thought was clean and fresh-tasting and I could also detect citrussy flavours and aromas. It was lemon-gold in colour, and the flavour lingered a while on the tongue after a sip. As I slowly sipped, I started craving salty flavours – ham most probably, but I also knew that this wine would go well with a mild, creamy cheese too: Brie. And so I decided that I would cook a Brie and Prosciutto Tart to go with this wine. I kept a bit back, just to make sure it worked and it really did! The crisp wine worked brilliantly with the thin, buttery pastry and the prosciutto in the tart gave me the saltiness I craved. The Brie was mellow and soft, and not harsh as a cheddar would be, and the asparagus just gave it a freshness that finished the whole thing off.
The second bottle I tried, the Chablis Premier Cru, I felt had a much stronger flavour and while it still had a clean, citrus taste, it seemed more fruity to me. In fact, as I sipped, I fancied popping a plump, sweet raspberry in my mouth – strange, but I did.

I felt that the second wine would work well also with the tart, but also with something creamy and with chicken as the main ingredient. This dish I made from the ingredients from Vaucluse would be perfect – chicken thighs in a creamy garlic and herb sauce. I also thought that both wines would work very well with fish. As I imagined tucking into a plate of salmon I could see that the dryness of both wines would counteract the oily fish and the citrussy taste would compliment it.

Creamy Chicken and Herbs

  
I loved both the wines, but of the two, my favourite was the Premier Cru – it just seemed to have a fuller flavour and there seemed to be a lot more going on in the taste. You could sit there for ages, gazing into the distance, trying to detect whether it’s the lemony or grapefruity flavours that are rippling over your tastebuds. Before this week, I’d regarded wine as something special to sip on while you’re cooking the Sunday roast or sharing a bottle in front of an old film, but now I’ll be more careful to try and detect the flavours that have gone into the wine and give it – and the winemakers – the respect they both deserve.


Brie, Prosciutto and Asparagus Tart
Serves 8-10
Ingredients
  • 1 small onion, sliced
  • 40g unsalted butter
  • 1 ½ tablespoons olive oil
  • 4-5 asparagus tips (save the stalks for soup)
  • 2 eggs
  • 1 egg yolk
  • 150ml double cream
  • 50g Brie
  • 175g shortcrust pastry
  • 70g prosciutto
  • salt and black pepper

Method
  1.   Butter a 20cm flan tin and set to one side, and preheat the oven to 180C.
  2. Slice the onion and fry gently in a knob of butter and a tiny trickle of olive oil, until soft. Leave to cool. While the onion is cooling, melt the 40g butter and pour in the 1½ tablespoons olive oil and mix together. Set to one side. Pour boiling water from the kettle over the asparagus tips and leave for 1-2 minutes. Drain.
  3. Beat the eggs and double cream together in a bowl. Chop the Brie into small pieces – it’s quite sticky so as long as you have little chunks it’s fine. Take the prosciutto and put 20g to one side. Chop the rest into small pieces. Fold the chopped prosciutto and the brie into the egg and cream mixture, along with the melted butter and oil. Stir to mix everything together and finish with a good grinding of black pepper.
  4. Line your flan tin with the pastry, cover with greaseproof paper and baking beans and bake for 15 minutes. Carefully remove the beans and the paper (leave to cool if you have to, don’t burn yourself!) and turn the oven down to 160C.
  5. Pour the filling into the tart case and arrange the asparagus tips on top. Curl up the reserved prosciutto slices and arrange these over the top of the tart – they’ll go crisp in the oven. 
  6. Bake the tart for 40 minutes, until the pastry is golden and the filling has set. Leave to cool to room temperature and cut into wedges. Serve with a green salad and a cool glass of Chablis.


LinkWithin

Related Posts Plugin for WordPress, Blogger...